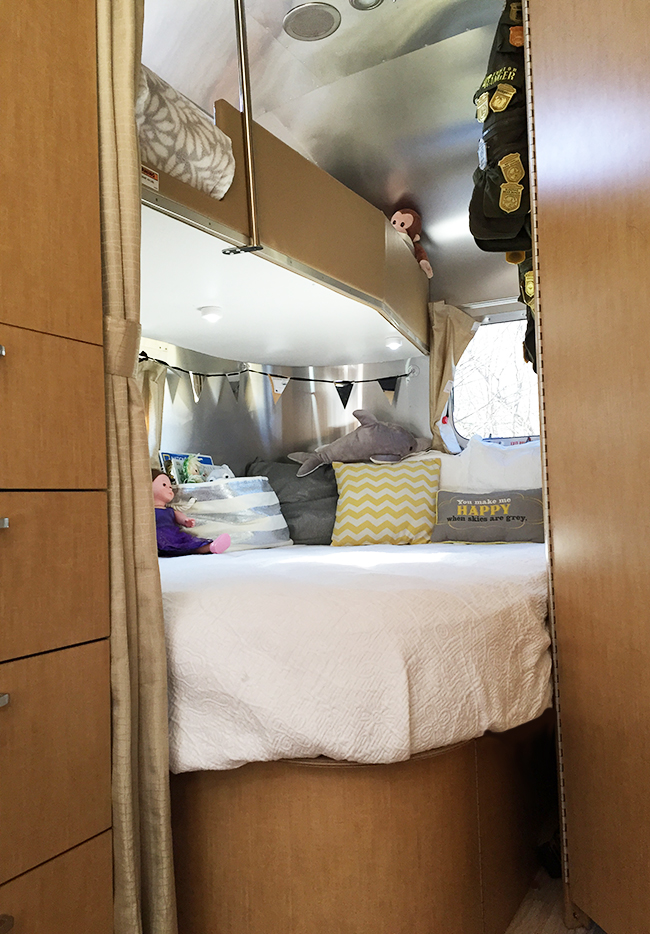
We started with a tour of our Airstream bathroom last month and I’ve finally rounded up photos of the kid’s bunk area to share with you. When we started looking at Airstreams we knew we wanted to pick a model that allowed us each our own permanent sleeping area. I really didn’t want to have to turn a table or a couch into a bed every night and I felt it was important for us to each have a space we could call our own.

That’s why when we spotted the 2015 Airstream Flying Cloud BUNK model we knew it was the one. With a set of bunks in the back of the trailer there would be plenty of space for two small kids to both play and sleep. The bottom bunk measures 54″ x 76″ – which is *almost* as big as the queen we have up front – allowing for lots of room to play on the bed. And the top bunk measures 29″ x 78″ which is essentially a small twin – not a lot of room to play but a really cool place to sleep.
The beds share a wall with the bathrooms (see our Airstream bathroom here) and when you step off the bottom bed you are standing in front of the bathroom door, the clothing wardrobe and pantry (essentially the kitchen).
Let’s take a look at the beds. . .
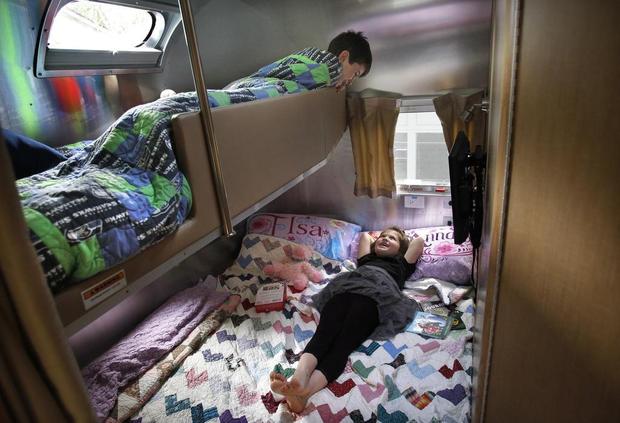 photo credit: The News Tribune (June 2015)
The kid’s bunk area has had many different “looks” over the last 7 months. Different bedding, different pillows, different decorations – it seems to cycle through as I try to find just the right set up. When we first started the bed had a vintage-looking “heart” quilt on it that I had made in high school – and the top bed had a Seahawks quilt I made a few years ago. I LOVED it, I really did, but as time went on the patterns and designs were a bit too much for the small space. Imagine that bed with a ton of toys on top of it. I needed something more simple because essentially it’s like having a kid’s room in your main living room.
I bought some navy blue bedding from IKEA back in Virginia (October) but as we headed into winter the dark bedding made the space seem closed in and darker than I wanted. Most recently I switched to a white comforter – and it’s brightened the whole area up so much – making the space more welcoming and making the most of the limited light.

Let’s talk about a few things I’ve discovered about this back bottom bed. . .
You have to learn how to LEVITATE if you want to make it easily. Yes, it’s one of those. You can’t stand on the side and make it. You have to start at the back (near the window) and tuck corners and ultimately end up in the front corner to finish it off. A serious pain in the butt. Since my kids have never been big under-the-sheet-sleepers, we leave the white comforter tucked in and use our lovies and fleece blankets for sleeping on top (they did the same thing in our house). This saves a lot of headache over making an impossible bed every day.
You cannot have a fluffy comforter on this bed if you want to “make” the bed by tucking the comforter along the sides. There is no room for that nonsense because the space between the mattress and the wall is so limited. The best you will do is a quilt-style blanket.
It can get very dark under the bunk, so we installed battery-powered tap lights (found at Costco, with adhesive backing). This has helped tremendously with light when the kids are playing or reading on the bottom bed (see photo above).
Other things you might want to know about the back bottom bed are :
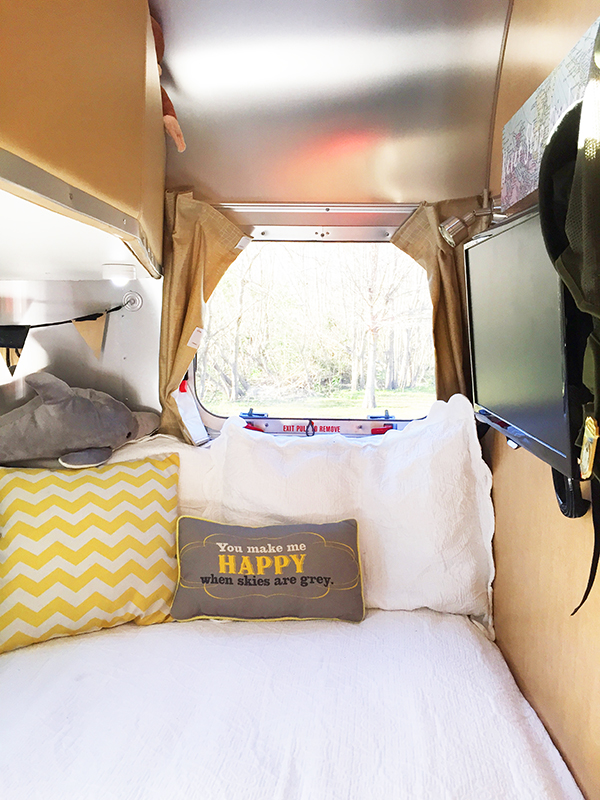
The very back window is an emergency exit window. This is of course a GOOD thing to have. . .but if you have a toddler who is tempted to pull a red cord right next to sign that says EMERGENCY this bed might not be a good fit for you. 🙂 My kids have been taught how to use the Emergency exit if they need and NOT to play with it – we haven’t had any issues in this department. There is also an electrical outlet at the head of the bed (right under the emergency escape window) – thankfully our kids don’t mess with those. If you have younger kids this is definitely something to consider.
The back window does open up and gives a nice cross breeze across the trailer. My kids have been so lucky to fall asleep to so many sounds and sights out this back window – ocean waves, birds chirping, frogs croaking. . .I love that the view and sounds change as we head around the country.
You’ll find a little portal window off to the left when you’re looking at the bottom bed.
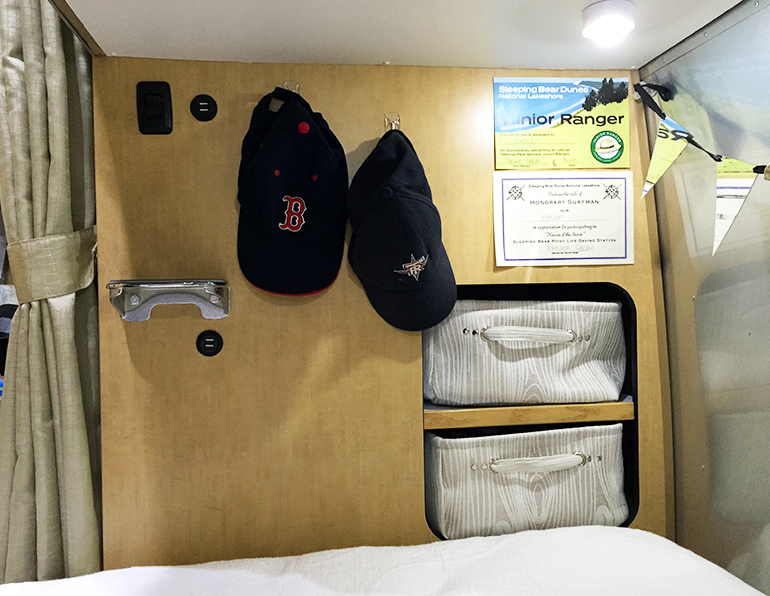
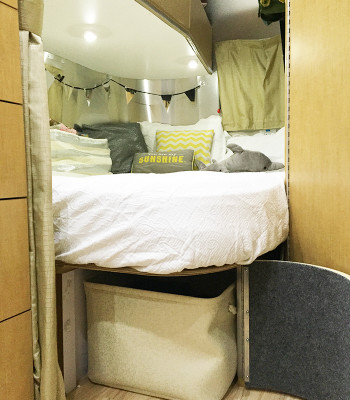
There are TWO cubbies at the foot of the bed. This is great storage for small toys. We measured the space and purchased soft-sided bins (from Home Goods) that better fill the space than the plastic bins that came standard with the Airstream when we purchased it.
There are a whopping four (4) USB chargers on that wall – right next to the cubbies. Great for charging electronics.
The metal ledge that you see in the far left part of the photo is not a shelf – it’s actually a step to get up to the top bunk
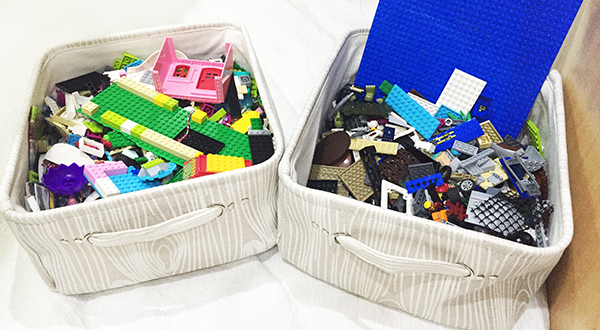
In the small cubby area, we have our LEGOs. These are the toys most often played with – so they are the most accessible. Each kid has their own bin of LEGOs. Seriously the best toy on the planet for full-time travelers. Small but packing a serious punch when it comes to using their imaginations.
Behind the LEGO bin in the cubby, they also each have a smaller box for their most prized possessions. 🙂 The contents changes regularly and varies greatly between my daughter and son – but the boxes often includes things like rocks, twigs, trading cards, memorabilia, toys. . .
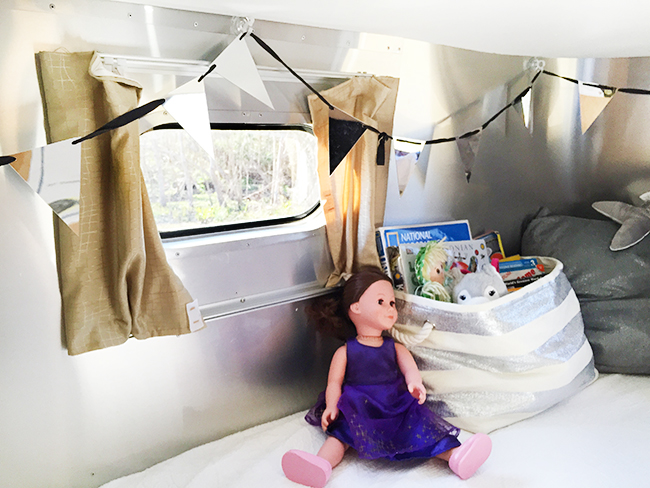
The bottom bed is wide enough for storage along the wall – with still plenty of room for a 5-year-old to sleep. We have found soft-sided storage bins are the BEST choice for the bed. They don’t scratch the walls and although our kids aren’t big movers when they sleep – these would work best if they did roll over or near them. We primarily keep books in the soft-sided bins so that the kids have easy access to reading materials – but it’s also great for stuffed animals, dolls and small toys.
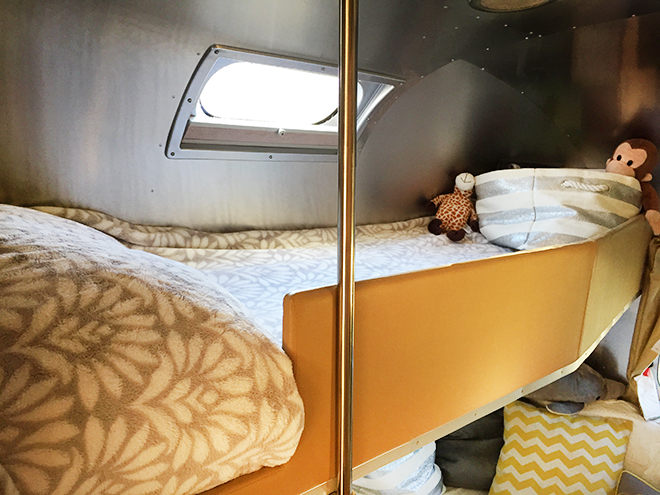
The top bed doesn’t have a whole lot of storage space but we keep a soft-sided bin at the foot of the bed for books and small toys. The bed is long enough that this still gives the kids plenty of length and they don’t feel scrunched.
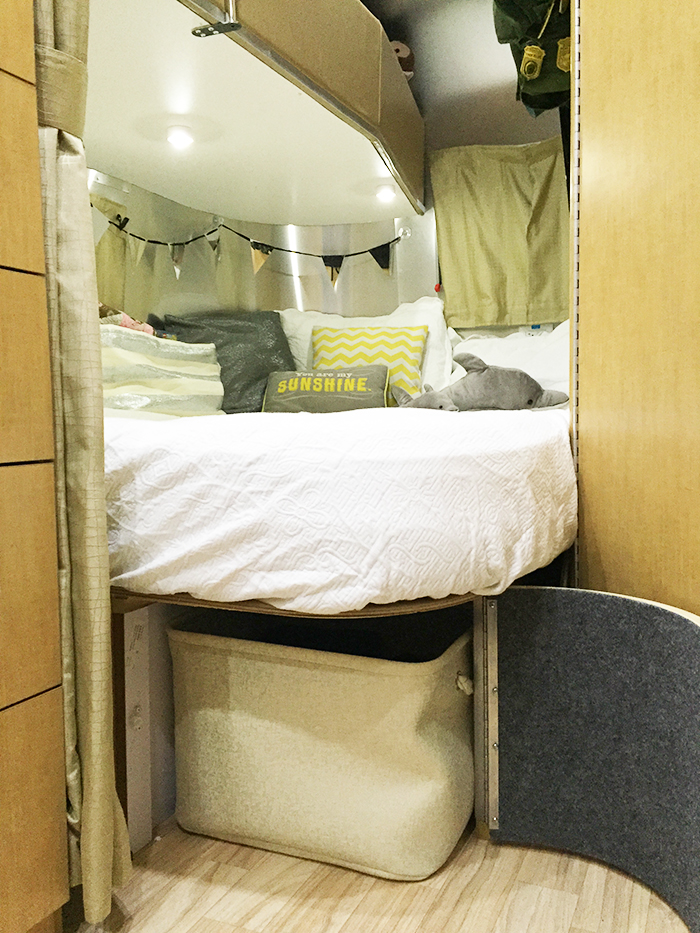
Under the back bed is our saving grace – a nice big storage area for toys. A cabinet door opens at the foot of the bed.
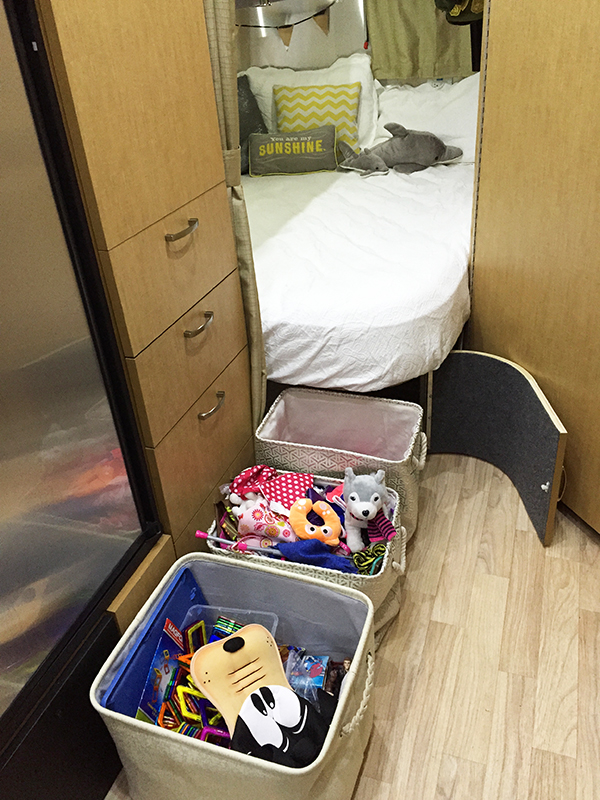
It came from the Airstream factory with one big plastic storage bin inside, but I found it didn’t make the most of the space under the bed. So instead we went to Home Goods and bought soft sided bins just the right size to use up every possible inch. Each kid gets a bin. Then we have a third miscellaneous bin.
I worried a lot before we starting traveling that the lack of toys would be a problem. I was silly to worry about this – they still have so many more toys than most kids in the world and they spend so much time exploring outside that we rarely have problems of boredom. If anything, streamlining our toys has been a BLESSSING – there isn’t the burden of cleaning and organizing that we had in the house. I think sometimes kids have so many toy choices – and such chaos – that it’s hard to focus on any particular thing. I know we had that problem when we were in the house. We all spend a lot less time cleaning up and a lot MORE time doing things that are more important to us – like exploring, reading, playing games and more. . .
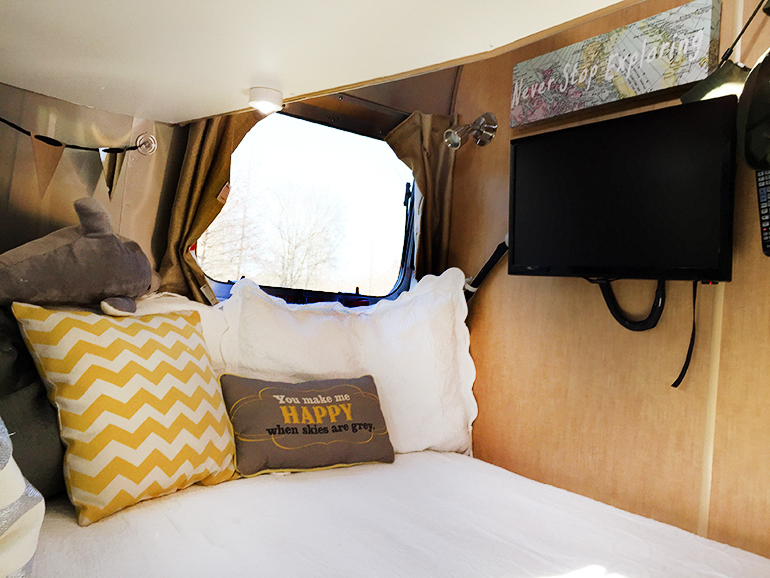
On the kid’s inside bedroom wall there is a TV – it came with this particular trailer otherwise I’m pretty certain we wouldn’t have added it on (I believe it’s optional if you are ordering a model). The TV is wired to the main Blu-ray/sound system so the kids can watch movies or local TV channels (via air satellite). You can see the remote peeking out on the right side of the TV – one of the first things I did was attach Velcro to all our remotes – so they just stick on the wall behind/next to the TVs. It’s made it easy not to lose them and there really is no good place to keep them otherwise.
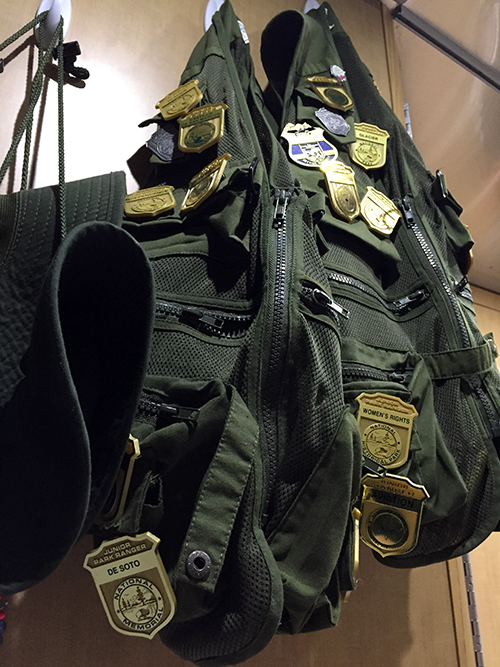
We’ve added damage-free hooks for Junior Ranger vests and hats. We also use the walls to hang up certificates and pictures
There is no door for the back bedroom, it’s a thick curtain. I prefer it this way. I can hear the kids if I need, there is no slamming doors and it’s an open floor plan. When we tuck the kids into bed at night the curtain is generally 3/4 of the way closed (to block out light and noise), but we ALWAYS open it before we got to bed – so the kids can get out of bed easily in the middle of the night and it helps with air circulation.
Eventually I want to replace the drab brown curtains with a fabric that I love – this includes the long curtain that serves as the door and the window curtains. I might take advantage of my Grandma’s sewing machine in Arizona to get this job done – and I’ll post new photos if/when that happens.
Products I mentioned in this post or products we use in the room ::
- Command Medium Hooks, White, 6-Hook
- VELCRO – Sticky Back – 3 1/2″ x 3/4″ Strips, 4 Sets – Black
- Adams Manufacturing 6500-74-3040 1-3/4-Inch Suction Cup Hook, Medium, 3-Pack
- Cute bunting banners
– we got our silver bunting banner at Target
Toys that we find are great for limited storage space ::
- LEGO sets
- Magnaformers
- Off-fashioned marbles
- Shopkins
- Books on Kindle
- Trading cards – Minecraft, Star Wars, Sports teams, Pokemon
- An 18-inch doll (like American Girl doll) with clothes/accessories
- Craft supplies, journals
- Travel games
- Lots of outdoor toys (more on this later
So that’s a tour of the bunks in the 2015 Airstream Flying Cloud Bunk model. Our kids love their space and we have no regrets buying this model – it’s worked out great for our kids. We hope you enjoy us sharing the photos and details about the space!
Stay tuned for our next Airstream tour post when we show you around the kitchen! If you missed it earlier, check out our bathroom tour here.
Thanks for sharing. This tour is very fun to see. I like that you got better containers to take advantage of every inch…exactly what I would do.
Tracy – Thanks for taking the time to comment. So glad you like the tour posts. Refining the limited storage space has definitely been a process but I feel like we’re starting to figure it out!
Thanks for the tour! Looks so cozy and I absolutely love your decorating style in the bedrooms. I sure wouldn’t mind living there. I look forward to seeing more.
Hi Mara, Thanks for commenting! Glad you like the tour. 🙂
Thank you for sharing! Great ideas, nothing like learning from others experience!
Hi Pam – You’re welcome! Thanks for following and for commenting!
Thanks so much for the post, we just purchased the same model and I have found it very helpful to see how you are making it work! We haven’t ‘moved’ in yet, so I haven’t started to buy bins and other things. I am thinking about what we need! Can’t wait to see your kitchen and how it is outfitted.
Hi Sarah – Congrats and how exciting that you have the same model. The first thing I did was get a notebook and measure the entire trailer – all the cabinets and storage spaces – with little sketches so I can see the dimensions. I carried that notebook and a measuring tape in my purse so when I would find things I liked, I could see if they fit before buying them. I still carry those measurements with me nearly a year later! It saves so much hassle when you know what type of space you’re dealing with.
Great idea– thanks! I have read that the floor can be difficult to clean. Have you experienced that? I wonder if we should buy a washable runner or just get used to dirty floors?
So the floors – even with good rugs by the door and removing our shoes on the rug by the front door EVERY TIME we still have to sweep a few times a day. Seems like I’m always sweeping. But I suppose when you have 4 people in a small square footage area (instead across a 2,000 square feet house) it’s all just magnified in the smaller area. Think about the dining room, kitchen, bedrooms, bathroom and kitchen all sharing the same floor. It sweeps up without issue and I use cleaning wipes for spot “mopping” when needed. It’s laminate so it does clean up fairly easily and for this reason I feel it’s pretty low maintenance (versus the sweeping, mopping, vacuuming I was doing in our big house!). I think the big key is shoes come off at the door, always! And a mat outside helps, too! Hope this helps!
I love this series. We have a flagstaff camper with an almost identical floor plan. We use it a total of about 4 weeks out of the year but I am getting some great ideas from your tours. Can’t wait to see the kitchen!
Julie – I’m so glad the tour posts are giving you some ideas! Where do you go during your 4 weeks!?! Kitchen will be coming in a couple (three?) weeks, I’m slow at getting these posts done!
Thanks for the tour. Love your ideas about how to maximize and find storage space. I was surprised to learn that there isn’t storage space under the entire lower bed. What’s on the other side of the bed…a tank?
Hi Cheryl – Against the back and side wall there are outdoor storage compartments and the water heater. 🙂
Have followed your every move. Since fall, dh has been begging for a motor home, now that he is retired. I refused until 2 weeks ago, and went to look at one he found. Last Fri we drove to gas up and back home on the freeway. Then across town to sis for a cocktail celebration toast. Have never camped, and anxious to see your kitchen set up. It is a 30′ Fleetwood and Chevy engine that runs on regular. With cheap gas right now, I thought we could try this. Do you resort to paper, or do dishes 3x day? Do you eat out at least one meal a day?Do you use melamac or regular china, and plastic glassware or glass? Need help. Glad you finally got an electric pressure cooker. I love both my 6 and 8 at electric, as well as my stainless range top model. Food tastes so much better and you can use cheaper cuts, as well as the time saving.
really enjoyed reading your hints for organization and wish you well
Fun! This is a cute and snuggly bunk room. I’m impressed at all the badges the kids have earned. We also have found the lack of toys not to be a problem.