A Happy Hive

The best in savings, home, food and travel

  • Savings
  • Home
  • Food
  • Travel
  • Savings
    • Grocery
    • Print Coupons
  • Your Home
    • Chicken Coops
    • Gardening
  • Food
  • Travel
  • Earn Money
  • Rise & Shine
  • About
  • Contact Us

Cook quinoa in the rice cooker (shhh, don’t tell the rice)

Shared May 22, 2016

Quinoa-in-rice-cooker

I hope the rice in my pantry doesn’t know that I’m seeing someone else. I tried to be sneaky, but I think they have an idea – their neighbor, the quinoa container is empty and the rice cooker is suspiciously absent from the adjacent shelf. That’s right. I’m guilty. I put the quinoa in the rice cooker this morning. The encounter was short, steamy and in my humble opinion – a match made in heaven.

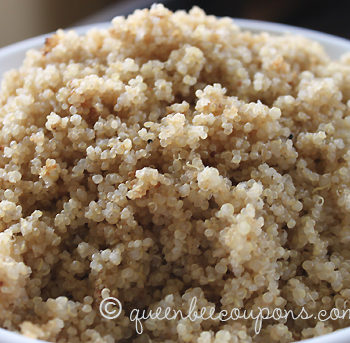
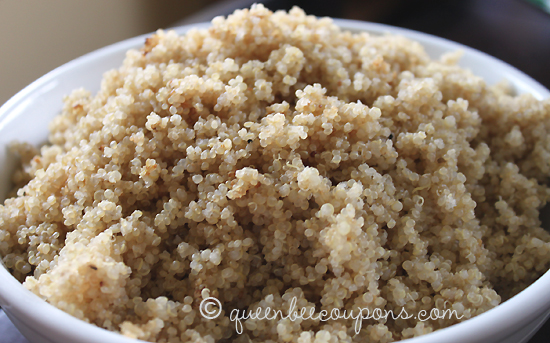
Quinoa in the Rice Cooker
 
Save Print
Author: Heather
Recipe type: Quinoa
Ingredients
  • 1 cup quinoa
  • 2 cups water
Instructions
  1. Rinse quinoa in a fine-mesh strainer. Some varieties you don’t have to rinse. But the way I figure – it can’t hurt to give the quinoa a nice bath before you eat it.
  2. Toss 1 cup quinoa into rice cooker (I have a basic Aroma rice cooker from Costco, see rice cookers on sale at Amazon)
  3. Pour 2 cups water into rice cooker
  4. Start rice cooker. I used the “white rice setting” and it appears to have worked!
  5. When rice cooker dings – you’re done!
3.5.3208

Depending on your rice cooker – you might need more water. You can start with a 1:2 ratio. If it’s too dry – add 1/4 cup more water the next time. Troubleshoot by adding 1/4 cup at a time until you find the right setting for you. If you prefer you can substitute chicken broth (or vegetable broth) for the water to give the quinoa a richer flavor.

Where to buy quinoa
I recommend buying it in bulk at Winco or Costco (Sam’s club).

(Thanks to Gluten FREE Goddess for helping me out!)

 What other things, besides rice, do you put in your rice cooker? Don’t worry, I won’t tell the rice.

Comments

Filed Under: Recipes

Arugula Pasta Salad with Blue Cheese and Pecans

Shared May 22, 2016

Arugula-Pasta-Salad

This salad would make a great potluck dish or add chicken and it would easily be a filling dinner. This Arugula Pasta Salad combines spicy arugula with blue cheese and crunchy walnuts to make for a party in your mouth.

Arugula Pasta Salad with Blue Cheese and Pecans
 
Save Print
Author: Heather
Recipe type: Salad
Ingredients
  • 6 ounces pasta, such as bow tie or farfalle
  • 2 Cups Arugula (preferably baby leaves, stems removed) (Trader Joe’s sells a bag of arugula for about $2)
  • 1 Cup Grape tomatoes
  • 2 Tablespoons chives, chopped finely
  • 2 Tablespoons chopped walnuts or pecans
  • 1 Tablespoon white wine vinegar
  • 1 Tablespoon Olive Oil (extra virgin)
  • ¼ teaspoon table salt
  • ¼ teaspoon black pepper
  • 3 Tablespoon blue cheese, crumbled
Instructions
  1. Cook pasta according to instructions on package. Before draining, set aside 1 Tablespoon of pasta water. Drain noodles, pour into a bowl and mix in your arugula leaves while pasta is still hot. Cover. This lightly steams your arugula leaves!
  2. Toast chopped walnuts over medium-high heat until lightly browned. Set aside.
  3. Make your dressing – whisk together white wine vinegar, oil, reserved pasta water, salt and pepper.
  4. Pour dressing over salad and toss well. Sprinkle with nuts and blue cheese.
  5. Add chicken to make this meal more substantial.
3.5.3208

Do you have a favorite salad recipe? Let us know – we’d love to hear from you!

Comments

Filed Under: Recipes

Grilled Asparagus with Garlic and Olive Oil

Shared May 19, 2016

Grilled-Asparagus-with-Garlic

If you’ve followed my recipes at all – you know I love garlic. This recipe didn’t disappoint in the garlic department and it’s sooo easy!

Grilled Asparagus with Garlic and Olive Oil
 
Save Print
Author: Heather
Recipe type: Grilled, Vegetables
Ingredients
  • Asparagus
  • Olive oil
  • Fresh garlic, peeled and minced – as much or as little as you like. I think you can never have too much garlic. We used 5 or 6 cloves.
  • Rock salt
  • Optional: Parmesan cheese garnish
Instructions
  1. Cut off bottom tips of the asparagus. This are generally stringy and fibrous.
  2. Put the asparagus tops in a glass pan or dish (with lid) or a large resealable bag.
  3. Drizzle olive oil over asparagus, add minced garlic. Let it sit. If it’s in a resealable bag you can occasionally move bag around for good coverage. If they are in a pan, move them around a couple times.
  4. Sprinkle with a little salt, place on grill medium-low heat and grill for about 6 to 7 minutes until tender.
  5. Garnish with shaved parmesan cheese (optional)
3.5.3208

We enjoyed this recipe with grilled honey-teriyaki chicken!

What’s your favorite way to way to make asparagus?

Comments

Filed Under: Recipes

Grilled Honey Teriyaki Chicken

Shared May 19, 2016

Honey-Teriyaki-Grilled-Chicken
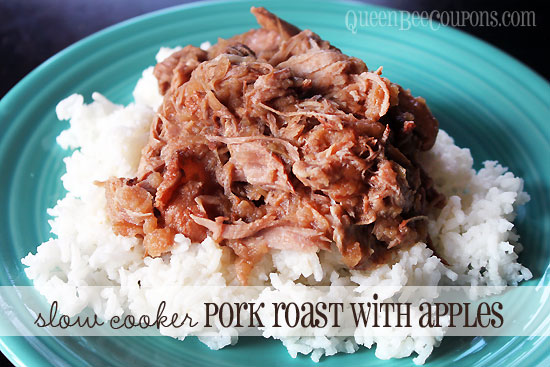
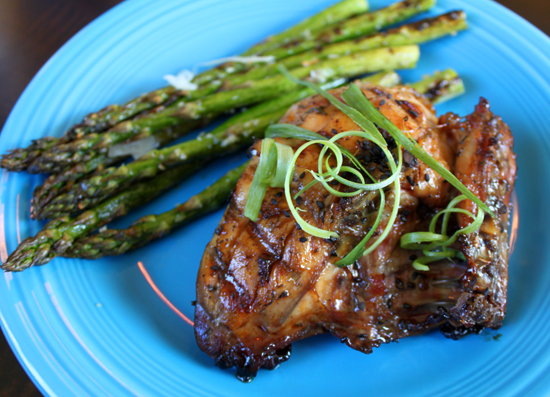
Mr. Queen Bee made this for dinner last night and it was so yummy! We admit we are grilling amateurs – we do the basics like burgers, hot dogs, chicken breasts and the occasional steak. But last week Fred Meyer had grill packs for $0.88 a pound, so we figured we’d give grilled teriyaki chicken a try – my oh my, we hope you like it as much as we do!

Recipe credit goes to the Food Network’s Grilled Honey-Teriyaki Chicken recipe.

Grilled Honey Teriyaki Chicken
 
Save Print
Author: Heather
Recipe type: Grill, Chicken
Ingredients
  • Chicken (We used a grill pack filled with different cuts of chicken)
BRINE
  • 2 cups water
  • 1 cup light brown sugar (We used regular)
  • ½ head garlic, unpeeled
  • 4 slices fresh ginger root, gently bashed to open up. (We ended up using jarred ginger, because we didn’t have fresh)
  • 2 tablespoons kosher salt
  • 8 sprigs fresh thyme
GLAZE
  • 2 cups teriyaki sauce
  • ¼ cup honey
  • 1 large (1-inch) piece fresh ginger root, sliced and bashed to open up (We ended up using jarred ginger, because we didn’t have fresh)
  • 1 head garlic, halved crosswise
  • 1 teaspoon toasted sesame oil, plus ½ cup
  • Freshly ground black pepper
  • Scallion threads, for garnish
  • Toasted sesame seeds, for garnish
Instructions
  1. Make your brine. Combine water, brown sugar, garlic, ginger, salt and thyme in a large resealable bag and mix to dissolve your sugar. We ended up using a glass cake pan with a lid.
  2. Rinse your chicken, pat dry with paper towels. Add to brine for a couple hours in the refrigerator. You can shake it up every once in awhile to really coat the chicken.
  3. When you’re ready – preheat your grill on low-medium heat – not too hot!
  4. Make your teriyaki glaze in a small saucepan, over medium-heat. Combine teriyaki sauce, honey, ginger, garlic, and one teaspoon of sesame oil. Simmer until rich and slightly reduced.
  5. Remove chicken from brine and pat it dry. Toss the brine, you won’t use it again. Add chicken to large bowl, drizzle with ¼ cup toasted sesame oil and season with fresh ground black pepper.
  6. Toss to coat and grill on low-medium heat for up 17-20 minutes per side until cooked through. You are going to baste with the teriyaki glaze only the last 5-7 minutes of cooking. This is a key to cooking with sugary glazes – cook the meat slow and low and then only baste toward the ends – otherwise the sugars easily burn on high heat.
  7. You can garnish with scallions and toasted sesame seeds. If you cut the scallions on a bias and soak in ice water they curl up all artsy.
  8. We served with grilled asparagus.
3.5.3208

What are you grilling this week?

Comments

Filed Under: Chicken, Recipes

Whole Chicken in the Slow Cooker

Shared May 19, 2016

Whole-Chicken-Crockpot-recipe-slow-cooker (1)

One of the easiest ways to cook a whole chicken is in a slow cooker! The possibilities are endless, but I’m going to share two of my favorite recipes for cooking a whole chicken in a slow cooker.

First let’s talk about whole chickens, I also call them roasters – because that’s typically how people cook them (read my tutorial on roasting two chickens at once here). They are a VERY frugal protein – often costing $0.88/lb to $0.99/lb on sale. I like to stock up when under a pound and they freeze beautifully. Not only can you get a substantial meal from the chicken – but the bones and “leftovers” makes amazing slow cooker chicken broth. It’s the meal that keeps on giving.

Whole Chicken in the Slow Cooker
 
Save Print
Author: Heather
Recipe type: Slow Cooker, Chicken
Ingredients
  • Whole roasting chicken – between 3-5 pounds
  • Fresh or thawed. Don’t try this with a frozen whole chicken.
  • 2 medium onions, sliced in half
  • 1 Tablespoon italian seasoning
  • 1 Tablespoon olive oil
  • 1.5 teaspoons kosher salt
  • 1 teaspoon paprika – I prefer smoked paprika, but any kind works.
  • 1 teaspoon dried thyme
  • 1 teaspoon minced garlic – dried or fresh
Instructions
  1. Clean out the giblets and other items in the chicken. Save for other recipe or discard.
  2. Clean up chicken – I like to cut off any large fat chunks. I like to rinse the chicken and pat dry with a paper towel. Set chicken aside.
  3. Peel and slice onions in half. Place the four onion halves, flat side down in crockpot. I like to do this because it props up the chicken and keeps it off the main heat and out of the juices.
  4. Place chicken, breasts down, on top of the onions.
  5. In a small bowl, mix together the olive oil and the seasonings.
  6. Poor seasoning on to chicken and rub it all around. Give the chicken a thick coating of seasonings.
  7. Turn slow cooker on low and cook for 8 hours on low (or 4-5 hours on high).
  8. Using a meat thermometer, confirm temperature is at least 165 degrees (per food safety standards)
  9. Pull chicken apart – watch for bones, the whole chicken should come apart easily – much easier than when roasting so it’s much more prone to little bones.
  10. Serve hot and enjoy.
3.5.3208

TACO VARIATION – For a different variation, instead of the seasonings listed above, just rub a package of taco seasoning all over chicken. Cook as directed above. It will have a very light taco flavoring – great for salads or enchiladas. If you don’t want to use the pre-packaged stuff,  you can easily make your own taco seasoning.

What do you like to do with your easy slow-roasted chicken?


Comments

Filed Under: Chicken, Recipes, Slow Cooker

Slow Cooker Chicken Broth

Shared May 19, 2016

Slow-Cooker-Chicken_Broth

Dinner is over and you find yourself with a roasted chicken carcass. You could toss it in the garbage – but if you toss it into the slow cooker with a few simple ingredients you’ll wake up to some delicious homemade chicken broth or stock. Last week we had rotisserie chicken spinach salad (thanks to a trip to Costco), so I took my rotisserie chicken carcass and made chicken broth while I slept!

I think Costco rotisserie chickens are my favorite. They are larger than the ones you’ll find at grocery stores and for only $4.99 they are definitely the best bargain. I do like the flavor better, too. And that transferred really well into the stock.

Slow Cooker Chicken Broth
 
Save Print
Author: Heather
Recipe type: Slow Cooker, Chicken
Ingredients
  • Leftover roasted chicken carcass (basically everything leftover)
  • See my post about roasting chickens or just use a store bought one.
  • Five (5) carrots
  • Five (5) celery stalks
  • One (1) onion, quartered
  • Two (2) bay leaves
  • Parsley, fresh or dried
  • A couple whole garlic cloves (or not, if you don’t like it)
  • Water
  • Salt, pepper to taste
Instructions
  1. Throw all ingredients into slow cooker.
  2. Fill slow cooker with water, leave about an inch at the top to avoid overfilling.
  3. Cook on high heat for about 8 hours. I have seen recipes that say to cook it on low, but I’m paranoid about keeping chicken at a low temperature for so long. That’s just me. So I cooked mine on high and it still turned out great. I’ve seen recipes that go for as long as 16 hours, but I found overnight was plenty on high.
  4. Using a ladle – spoon the broth mixture through a colander with very small holes into a larger bowl. If you have cheese cloth you can use this over a regular colander. This is to remove any bits of bone or vegetables from the broth. Be careful it will be hot.
  5. Pour strained broth into smaller containers for freezing. Leave some extra room to account for the liquid expansion when it freezes. I froze mine in 2 cup containers to make for easy measuring later.
3.5.3208

What do you think of this recipe? Let us know – we’d love to hear from you!

Comments

Filed Under: Chicken, Recipes, Slow Cooker

Roast Two Chickens at Once

Shared May 19, 2016

Roasting-Two-Chickens

I love saving time and energy – both seem to be in short supply these days. When I figured out that I could roast two chickens at once – doubling the output (and meals) with minimal extra work it was a serious “aha” moment!

The follow-up meals that can be built from the extra chicken are endless – sandwiches, salads, tacos, soups, casseroles, etc. It’s like killing two birds with one  . . .you get the point. The thing that pleases me most is the whole “production” only has to happen once – but you can use it for many other meals.

I realize if you have a large family (or teenagers) you might already roast two chickens at a time. Forgive me for just realizing this was a possibility!

Here is my recipe as we’ve always used for roasting chicken – I just modified it for two birds.

TOOLS NEEDED

Large roasting pan – At least 12 x 16 inches. Advice from the peanut gallery (take it for what it’s worth) – Invest in a good roasting pan. I had one for under $20 that started chipping and flaking within a year. Not good for your food and super frustrating. I ended up buying a Pampered Chef one (LOVE) and it looks brand new to this day – it’s at least three years old and has roasted a lot of chickens and turkeys. Not to mention it heats evenly, cleans up like a charm and won’t leech “non-stick” stuff on my food. You are probably looking at spending $100 or so on a pan – for a good one – but you’ll likely only buy one in your lifetime.

Something like this (has good ratings) over on Amazon: Calphalon LRS1805P Contemporary Stainless Special-Value 16-Inch Roaster with Nonstick Roasting Rack or Calphalon Contemporary Nonstick Roaster with Rack, Baster, Injector, and Lifters

Meat thermometer – A valuable and handy tool to have around when cooking. . .well, um, meats! You can buy them with alarms that go off when the meat has reached a certain temperature. We have something like this from Amazon: Taylor 1470 Digital Cooking Thermometer/Timer and it sits outside with the oven, but has a probe that goes into meat.

Roast Two Chickens at Once
 
Save Print
Author: Heather
Recipe type: Chicken
Ingredients
  • 2 whole chickens (4-5 pounds each) – as close to the same size as possible so they cook at same rate
  • 5-7 medium potatoes, quartered – whatever kind you like
  • 6-8 carrots, peeled
  • 6-8 celery stalks, quartered
  • 4-5 medium onions, quartered
  • 4-5 garlic cloves
  • 1-2 lemons
  • Olive oil
  • Thyme
  • Rosemary
  • Sweet basil
  • Sage
  • Kosher salt and pepper
Instructions
  1. Remove giblets and insides from chickens.
  2. Wash chickens well (do not use soap, haha) and make sure all feathers are removed. Dry very well with paper towels and set aside.
  3. Prep vegetables – quarter the potatoes, peel the carrots, quarter the celery stalks, peel and quarter the onions, quarter the lemons.
  4. Spread out all vegetables in the bottom of a large roasting pan. Add a few whole garlic cloves to the vegetables mix (or if you’re ambitious – mince garlic and mix it in). Reserve ½ onion, ½ lemon and two garlic cloves for chicken.
  5. Drizzle olive oil over vegetables, sprinkle with rosemary and sweet basil. We also had fresh parsley in the fridge, so we added that.
  6. It’s probably about time to preheat oven to 425 degrees
  7. Now back to the chicken – put a quarter of a lemon, quarter of an onion and a whole garlic clove in each chicken.
  8. Truss chickens with kitchen twine. This is to keep the legs in close to the body to keep them from burning. (Alton Brown does a great video tutorial on trussing turkey – same concept.)
  9. Put both chickens on top of vegetables in roasting pan.
  10. Drizzle olive oil over chickens, sprinkle salt, pepper, thyme, rosemary, sage and sweet basil on top. I also rub on minced garlic, but that’s because we LOVE garlic. If you don’t have a seasoning or don’t like one – leave it out, it won’t make too much of a difference.
  11. Pop in the oven at 425 degrees for 60 to 90 minutes (mine took exactly 75 minutes) – basically internal temperature of chicken breasts should read 180 degrees. Rotate pan half way through to help chickens cook evenly. If you need, you can also stir around veggies – but I usually just leave mine alone and they are delish.
  12. When your chickens have reached 180 internal degrees (as taken in the breast) – take chickens out of oven and if you can stand it, let them rest about 10 minutes before cutting (it will keep them more moist).
  13. Enjoy!
3.5.3208

What’s your favorite way to cook chicken?

Comments

Filed Under: Chicken, Recipes, Slow Cooker

Slow Cooker Pork Roast with Apples

Shared May 19, 2016

slow-cooker-pork-with-apples

This a perfect recipe for fall – using apples (in season and on sale!) and pork – both playing so nice together. It reminded me of sweet version of pulled pork. This recipe is adapted from Not Your Mother’s Slow Cooker Cookbook (Amazon link) – a true gem of a slow cooker cookbook, if you’re looking for one.

Slow Cooker Pork Roast with Apples
 
Save Print
Author: Heather
Recipe type: Slow Cooker, Pork
Ingredients
  • 3-4 pound pork roast (either pork shoulder or pork loin) - trimmed of visible fat, rinsed and dried with paper towel, seasoned with salt and pepper
  • 6-7 tart cooking apples - peeled, cored and quartered
  • ⅓ cup apple juice, fruity white wine or Champagne
  • ¼ cup firmly packed light brown sugar
  • 1½ teaspoon ground ginger
Instructions
  1. Preheat a large skillet on high heat. Add a little oil to the pan. Once oil is hot, toss the pork roast into the hot pan and brown on all sides.
  2. Throw all the apples into the slow cooker. Put the browned roast on top of the apples in the slow cooker.
  3. Combine apple juice, brown sugar and ginger in a small bowl and pour over roast.
  4. Cover and cook on high for 1 hour. Reduce to low heat and cook until fork tender for 7 to 8 hours. I think we just cooked ours on medium for 7-8 hours to avoid the hassle of changing the temp after an hour.
  5. After it’s cooked, if your pork is still in a solid state (not completely shredded) you can transfer to a warm platter and let it rest 10 minutes before serving. Our pork had completely fallen off the bones and resembled a pulled pork – this is probably because we used a roast instead of the suggested pork loin.
  6. Serve over rice, mashed potatoes or other starch.
3.5.3208

What’s cooking in your slow cooker today? Let us know in the comments!

Comments

Filed Under: Recipes, Slow Cooker

New Waldorf Salad with Lemon-Tarragon Vinaigrette

Shared May 19, 2016

Waldorf-Salad-Recipe-Lemon-Tarragon-Vinaigrette

This is a salad, baby. It’s unlike any salad I’ve ever had before – but one thing is certain, I’ll be having it again! The fresh tarragon makes this salad off the charts – don’t even think about leaving it out.

New Waldorf Salad with Lemon-Tarragon Vinaigrette
 
Save Print
Author: Heather
Recipe type: Salad, Vegetables
Ingredients
Dressing:
  • 2 Tablespoons white wine vinegar
  • 2 Tablespoons lemon juice
  • 2 Tablespoons honey or agave (less is okay if you want to cut down on sugar)
  • 1 teaspoon Dijon mustard
  • 1 clove garlic, minced
  • ½ teaspoon salt
  • ½ teaspoon freshly ground pepper
  • ⅔ Cup olive oil
  • ¼ Cup fresh tarragon leaves
Salad
  • 7 oz bag of baby argula, washed and dried (Trader Joe’s has this for about $1.99!)
  • 3 small granny smith apples, cored and cut into thin matchsticks
  • 2 ribs of celery, cut into thin matchsticks
  • ½ cup thinly shaved parmesan or romano cheese
  • ¼ cup candied nuts (pecans, sliced or slivered almonds or hazelnuts) or plain almonds, chopped
Instructions
TO MAKE THE DRESSING
  1. Combine first 7 ingredients in a food processor. While motor is running, add oil in a steady but slow stream until it emulsifies.
  2. Turn off motor running, add tarragon and pulse a few times until tarragon leaves are chopped and blended into dressing.
  3. Refrigerate in a covered container for up to a week.
FOR THE SALAD
  1. Prepare and slice the apples and immediately toss with enough dressing to coat the apples (to keep apples from oxidizing and turning brown).
  2. Prepare and add the sliced celery to the apples.
  3. Just before serving, add remaining ingredients with rest of dressing. Toss well and serve.
3.5.3208

What’s your favorite type of salad to make? Let us know!

Comments

Filed Under: Recipes

Baked Brie with Apricot Preserves – Plus, How to Make a Cheese Board

Shared May 19, 2016

Cheese-Board

Cheese. . . one of my favorite things! Whenever we gather with friends or family, one of my favorite things to bring (or to serve at my place) is a cheese platter. It’s always a hit.

The great thing about a cheese platter is you can change it up – every time – using whatever cheese is on sale at the time and serving it up with bread and apples.

Cheese-Platter-ideas

Some of my favorite cheeses to pick up are:

Gouda – Creamy and mild this is a great cheese for those who don’t like strong flavors.

Blue cheese – A nice strong blue cheese pairs well with cranberries and bacon flavors.

Smoked cheddar – Cheddar takes on a whole new life when it’s smoked!

Boursin – This creamy cheese is so easy! You can buy it with various herbs and flavors. It spreads easily on bread or crackers. Beware – you can’t eat just one bite.

Beecher’s Flagship – Whenever possible, I like to find local cheese to have on my cheese board.

Fresh mozzarella – Pair with fresh basil and fresh tomato slices (drizzle with balsamic vinegar, sprinkle with salt if you want to get fancy)

Cranberry Orange Cheese torte – Look for prepared packaged cheeses such as this cranberry orange cheese torte – to dress up your cheese board. This torte recommends freezing beforehand, for the best display.

Prosciutto panino – Take your cheese board up a big notch with fresh meats such as prosciutto. You can buy pre-made prosciutto cheese rolls or roll your own! You can also use toothpicks to skewer prosciutto with your favorite cheese – I like to skewer baby fresh mozzarellas, with cherry tomatoes, a sprig of basil and a piece of prosciutto!

Serve with thinly sliced french baguettes, crackers or apple slices! 

And if you’re 21 years or older – red wine is always a good match with your cheese board.  For an affordable priced red wine, I like 14 Hands Hot to Trot – usually $8.99 – $11.99 a bottle.

Baked-Brie-Apricot-Preserves-Recipe

One of the easiest (and more delicious) party dishes is baked brie with apricot preserves – it’s insanely easy to make and always one of the first things eaten at gatherings.  I like it because brie is a really affordable cheese – usually $3.99 – $4.99 for a large wedge.

Baked Brie with Apricot Preserves
 
Save Print
Author: Heather
Recipe type: Cheese
Ingredients
  • Brie wedge (Double creme is my favorite – but they are all good.)
  • Raw sliced almonds
  • Apricot preserves, 1 cup
  • Water crackers, apple slices, sliced bread
Instructions
  1. Unwrap brie and put into a baking dish (leave the white, edible rind). Make sure the baking dish has edges, as the brie will spread when it melts.
  2. Top with apricot preserves.
  3. Sprinkle a handful of sliced almonds on top.
  4. Cover with foil.
  5. Bake at 400 degrees for about 12-14 minutes, until the cheese is melted and the preserves have started to crystallize.
3.5.3208


What kinds of cheese do you like on your cheese board? Do you liked baked brie – or something else? Let’s hear your suggestions!

Comments

Filed Under: Recipes

  • « Previous Page
  • 1
  • …
  • 15
  • 16
  • 17
Happy-Hive-About

Recent Posts

  • How to Clean Stained Cutting Board {Naturally}
  • Homemade play dough using Kool-Aid or Jell-O (preschool teacher and kid approved!)
  • Homemade Hummingbird Food (Nectar)
  • Peanut Butter and Jelly Gelato {Kid-friendly recipe}
  • Spring Cupcake Designs – 6 Easy Spring and Easter Cupcake Designs

Recent Comments

  • Jana Miller on Cottonwood, Jerome, Sedona, Prescott, more {Arizona}
  • Sue Eichler on Cottonwood, Jerome, Sedona, Prescott, more {Arizona}
  • Paris Jeske on Earning a living on the road – How we (and others) are making money while we travel full-time
  • Paris Jeske on Earning a living on the road – How we (and others) are making money while we travel full-time
  • Karen on Healthcare benefits on the road – We break an arm and end up in emergency room!

Recent Posts

  • How to Clean Stained Cutting Board {Naturally}
  • Homemade play dough using Kool-Aid or Jell-O (preschool teacher and kid approved!)
  • Homemade Hummingbird Food (Nectar)
  • Peanut Butter and Jelly Gelato {Kid-friendly recipe}
  • Spring Cupcake Designs – 6 Easy Spring and Easter Cupcake Designs
This error message is only visible to WordPress admins

Error: No feed found.

Please go to the Instagram Feed settings page to create a feed.

Copyright ©2026, A Happy Hive. All Rights Reserved. Custom design by Pixel Me Designs