A Happy Hive

The best in savings, home, food and travel

  • Savings
  • Home
  • Food
  • Travel
  • Savings
    • Grocery
    • Print Coupons
  • Your Home
    • Chicken Coops
    • Gardening
  • Food
  • Travel
  • Earn Money
  • Rise & Shine
  • About
  • Contact Us

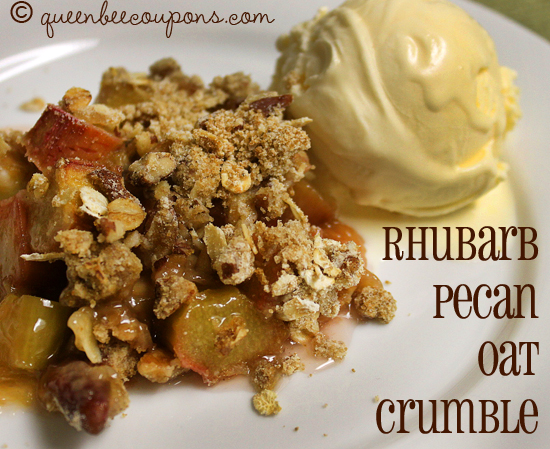
Rhubarb, Pecan, and Oat Crumble

Shared May 27, 2016

Rhubarb-pecan-oat-crumble

Our sweet neighbor brought us over a batch of rhubarb this week! She has it growing in mounds in her backyard and I’m so grateful that she shares it with us. I’m hoping I can grow something in my garden worth gifting in return!

So thanks to her, we my husband made our first rhubarb crumble and I just have to say – it’s yum-ble! We found the recipe in this delicious cookbook – Rustic Fruit Desserts: Crumbles, Buckles, Cobblers, Pandowdies, and More. The authors and geniuses behind the book are out of Portland, Oregon and it is a very cool book if you like to bake and you’re a fruit fan.

Rhubarb, Pecan, and Oat Crumble
 
Save Print
Author: Heather
Recipe type: Dessert
Ingredients
Crumble
  • ¾ cups all-purpose flour
  • ½ cup rolled oats
  • ½ cup packed brown sugar
  • ½ cup chopped pecans
  • ½ teaspoon fine sea salt
  • ¼ cup unsalted butter melted
Rhubarb filling
  • 1 cup granulated sugar
  • 2 tablespoons cornstarch
  • 3½ pounds rhubarb, trimmed and chopped into 1-inch pieces
  • (About 10½ cups or 2 pounds, 6 ounces)
  • 1 tablespoon pure vanilla extract
Instructions
  1. Preheat oven to 375 F.
  2. Butter a 3-quart baking dish. I used a 9 x 13 Pampered Chef stoneware casserole dish.
  3. To make crumble – mix flour, oats, brown sugar, pecans and salt together in a bowl. Stir in butter, then press mixture together with hands to form a few small clumps. Put topping in freezer while you make the rhubarb filling.
  4. To make rhubarb filling – rub the granulated sugar and cornstarch together in a bowl. Add rhubarb and vanilla and toss until evenly coated.
  5. Transfer rhubarb mixture into prepared pan. Spread crumble topping on top of rhubarb filling.
  6. Bake for about 45 minutes or until topping is golden and your rhubarb filling starts to bubble through the topping. Cool 20 minutes before serving.
  7. Serve warm with vanilla ice cream.
3.5.3208

Recipe credit: Rustic Fruit Desserts: Crumbles, Buckles, Cobblers, Pandowdies, and More.

What’s your favorite rhubarb recipe?

Comments

Filed Under: Recipes

Biscuit Mini Pizzas

Shared May 27, 2016

mini-biscuit-pizza-recipe

My kids love pizza. Whether it’s delivered, grilled, frozen, homemade dough, deli-fresh dough. . .they don’t really discriminate, they love pizza. This week we tried something new – mini pizzas with Pillsbury Grands! Flaky Biscuits. It was so incredibly easy, it’s a little ridiculous. You can literally have these done in under 15 minutes. And if you’re fast with the prep, I dare you to get ‘er done in 13 minutes. ? Did I mention they were easy?

My disclaimer – I’m not pretending they are healthy. Their redeeming quality is that that they are easy. Inexpensive. Fast. And actually taste pretty good.

Biscuit Mini Pizzas
 
Save Print
Author: Heather
Recipe type: Pizza
Ingredients
  • Pillsbury Grands! Flaky Biscuits - you can almost always find coupons for these, check the coupon database. If you prefer, make your own pizza dough with this recipe or Pillsbury makes a pizza crust, but it’s almost never included on sales like the biscuits.
  • Pizza Sauce or just tomato sauce
  • Oregano or Italian Seasoning
  • Mozzarella Cheese
  • Pepperoni
  • What other toppings you like - our favorites are black olives, basil, mushrooms, spinach
Instructions
  1. Preheat oven according to instructions on biscuit package. Mine said 375 degree F.
  2. Open the can of refrigerated biscuits. Using clean hands, stretch out the biscuits to make them flatter – about 6-inches across. If you had the time and patience – have the kids help! Work on a surface away from the preheating oven and have them help make their own.
  3. Spread out onto cookie sheet. I could fit six to a cookie sheet. Which left me with two “extras” that I put into mini heart-shaped spring form pans (see similar product on Amazon).
  4. Put about one spoonful of pizza sauce on each crust. Spread around. Sprinkle with italian seasoning (some sauces come pre-seasoned).
  5. Add cheese and other toppings
  6. Pop in the oven and check after 10 minutes. Bake until golden brown and cheese is melted!
3.5.3208

I “love” how the heart shaped ones turned out. Because they had a springform edge, I put more cheese on these – they were thicker pizzas. I think this would be a cute idea for Valentine’s day and I wonder, because of the edge, if you could layer them. . . . may have to try this at a later date!

If you’re a fan of thick-crust pizza you’ll love these. And they still have the flaky factor. If you prefer thinner crust you can either roll them out thinner (make bigger pizzas) or try and pull the layers apart. I didn’t try this, so I’m not sure exactly how it would work.

My kids approved! I hope yours do, too.

What’s your favorite topping for pizza? Have you made biscuit pizzas like these before? 

Comments

Filed Under: Recipes

Easy Peasy Pizza (Courtesy of Trader Joe’s)

Shared May 27, 2016

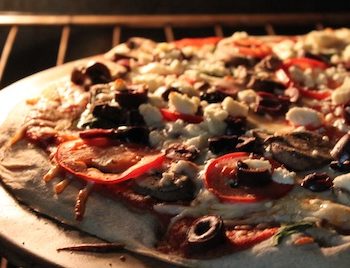
pizza-greek

We are a pizza lovin’ family and I can’t believe the price of frozen pizzas these days – so we usually make our own. When making our own pizza dough isn’t in the agenda, I love to pick up Trader’s Joe’s refrigerated pizza dough for only $1.29. You can get it in wheat, white and herb – and it’s the perfect foundation for the pizza of your choice!

If you hadn’t noticed yet, I’ve been kinda on a feta kick lately, so this pizza is a kind of Greek variety, but you can put whatever toppings you have around the house.

Easy Peasy Pizza (Courtesy of Trader Joe’s)
 
Save Print
Author: Heather
Recipe type: Pizza
Ingredients
  • Trader Joe’s pizza dough – only $1.29 at Trader Joe’s, look in refrigerated section
  • Tomato sauce (or pasta sauce)
  • Basil – I love the basil plants at Trader Joe’s, only $2.99 and you can get plenty from the initial plant, then keep growing your own (plus it makes your kitchen smell amazing!)
  • Sliced crimini mushrooms – I love Trader Joe’s mushrooms, they are super meaty and flavorful
  • Sliced Kalamata olives – Great price at Costco
  • Feta cheese – Also a great thing to get at Costco
  • Thinly sliced tomatoes
  • Whatever other toppings you like
Instructions
  1. The dough directions state you should set it out on the counter for 20 minutes to let it rise.
  2. We use baking stones, but you could probably use any pan that you have. Rub with olive oil. Roll out dough. You can make mini pizzas, one big pizza – whatever you’d like.
  3. Pre-cook the dough about 10 minutes. The directions don’t call for this, but we always like lots of toppings, so we find the dough cooks more thoroughly if we give it a head start.
  4. Add tomato sauce and toppings.
  5. Bake for about 10 minutes more, until crust is brown and toppings are melted.
3.5.3208

A lot of these same ingredients are in the Greek Chicken and Orzo Skillet recipe I posted last week, so if you have extras this might be something you want to make for dinner the next night.

What are you favorite pizza varieties?

Comments

Filed Under: Recipes

Greek Chicken and Orzo Skillet

Shared May 27, 2016

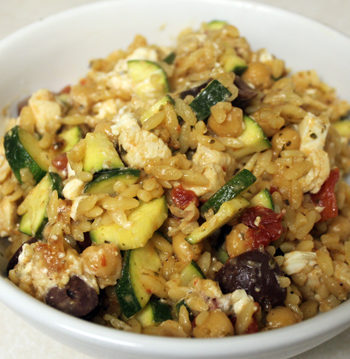
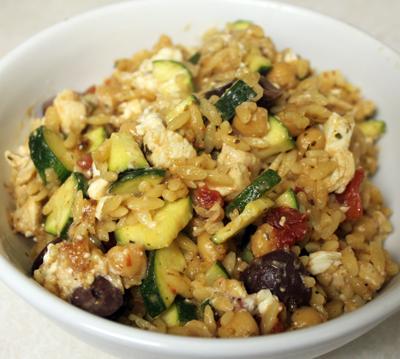
Greek-Orzo-Finished

I know I should probably be thinking about summer-time recipes but the weather here is still kind of chilly, so here’s a recipe that will warm you right up. And one of the best things about this recipe is you can prepare half of it ahead of time and freeze it (instructions at bottom of post), so when you go to make the meal it can be whipped up pretty quickly!

Greek Chicken and Orzo Skillet
 
Save Print
Ingredients
  • 1 lb chicken
  • 1 tbsp vegetable oil or olive oil
  • 2 medium zucchini, cut into ¼-in pieces
  • 2 cans (14 oz) chicken broth
  • ½ cup water
  • 1 pound uncooked orzo pasta (it can be found in pasta aisle, it’s just a round little pasta, almost looks like rice)
  • 1 can (15 oz) garbanzo beans, drained and rinsed
  • 1 can (14 oz) garlic and onion-flavored diced tomatoes
  • 2 oz crumbed Feta cheese
  • ½ cup coarsely chopped pitted kalamata olives (Costco has a great price on this)
  • 3 tbsp Greek rub/seasoning (see below)
You can buy pre-made Greek seasoning, but if you want to make it, you can combine these ingredients and store in air tight container for up to six months. Just use 3 tbsps for this recipe. (Thanks, AllRecipes for Greek Seasoning recipe)
  • 1½ teaspoons dried oregano
  • 1 teaspoon dried mint
  • 1 teaspoon dried thyme
  • ½ teaspoon dried basil
  • ½ teaspoon dried marjoram
  • ½ teaspoon dried minced onion
  • ¼ teaspoon dried minced garlic
If you want to do a vegetarian version of this – leave out chicken and use vegetable stock, maybe add more garbanzo beans and zucchini.
Instructions
  1. Cut chicken into ½ inch cubes and cook in skillet using olive oil or vegetable oil, set aside.
  2. Add garbanzo beans, chicken broth, Greek seasoning, canned tomatoes, and ½ cup water to skillet, cover. Bring to a simmer over medium-high heat.
  3. Reduce heat to medium, add uncooked orzo. Cover and cook for five minutes (or halfway through cooking time according to package instructions), stir occasionally.
  4. Add cooked chicken (from step 1) and zucchini. Cover and cook for 5-7 minutes or until orzo is tender and zucchini begins to soften.
  5. Remove from heat, top with feta cheese and sprinkle with kalamata olives.
  6. ENJOY!
  7. p.s. I personally think the salad does well cold too. So you can serve it cold or eat cold leftovers the next day.
  8. p.p.s. I love that this can all be cooked in one skillet, it doesn’t feel like there are many dishes when I’m done.
3.5.3208

TO PREPARE AND FREEZE
Get two gallon freezer bags. . .

In Bag #1, combine:
Cooked chicken
2 medium zucchini, cut into 1/4-in pieces

In Bag #2, combine:
1 can (15 oz) garbanzo beans, drained and rinsed
1 can (14 oz) garlic and onion-flavored diced tomatoes
3 tbsp Greek rub (see above for recipe)

Seal bag 2 and place into bag 1; seal. Freeze for up to three months. When it’s time to make your freezer meal, follow these instructions:

  1. Add contents of Bag 2, two cans (14 oz each) chicken broth and 1/2 cup water to skillet. Cover. Bring to simmer over medium-high heat
  2. Reduce heat to medium. Add 1 lb uncooked orzo. Cover and cook five minutes (or halfway through cooking time according to package directions), stir occasionally
  3. Add contents of Bag 1. Cover and cook 5-7 minutes or until orzo is tender and zucchini begins to soften. Remove from heat; top with 2 oz crumbled feta cheese. Sprinkle with 1/2 cup coarsely chopped pitted kalamata olives.

If you like to do freezer meals, I recommend checking out your local library for books with freezer meal recipes OR check out Amazon’s inventory for freezer meal books.

Recipe courtesy of Pampered Chef.

Leave a comment and let me know what you think. I’d also love for you to share any recipes that you might have.

Comments

Filed Under: Chicken, Recipes

How to Grill Pizza

Shared May 27, 2016

How-to-grill-pizza

I’ve shared my grandma’s recipe for homemade pizza dough in the bread maker. You have to try it, it’s incredibly easy and delicious.

Now you can bake your pizza, that’s what most people do. . . or if it’s a gorgeous summer night you can grill your pizza! It’s fast, easy and it doesn’t heat up your house. Plus I LOVE the smoky flavor that is adds to our pizza.

How to Grill Pizza
 
Save Print
Author: Heather
Recipe type: Pizza
Instructions
  1. Start with your dough. I like to roll them out into long skinny pizzas. They fit better on the grill (I think). Don’t roll it too thin, you don’t want it to rip or tear.
  2. Turn your grill on high and get it nice and hot.
  3. Sprinkle a pinch of flour on the dough and brush it with olive oil. Repeat on the other side. This will keep them from sticking to your grill. Some even suggest taking some olive oil and brushing it on your grill racks directly.
  4. Carefully put dough on grill, close lid and let it cook for about 1-2 minutes. Keep an eye on it – you don’t want it to burn! Then carefully flip it over and repeat on the other side.
  5. Remove crusts from heat and put your favorite toppings on them!
  6. Turn the heat down on the grill to medium. Return the pizzas to grill. At this point you just want to heat the toppings and meat the cheese without overcooking the underside of the pizza! Keep the lid closed to help it cook the toppings – as I heard one grilling expert say, “If you’re lookin’ . . . it ain’t cookin!”
  7. Once your cheese is melted and your ingredients are warm enough, remove it from the grill. It shouldn’t take long.
  8. Slice and eat. And if it’s nice – eat outside, the pizza tastes better when you’re sitting in the sun.
3.5.3208

What are your favorite pizza toppings? Have you ever grilled pizza before?

Comments

Filed Under: Recipes

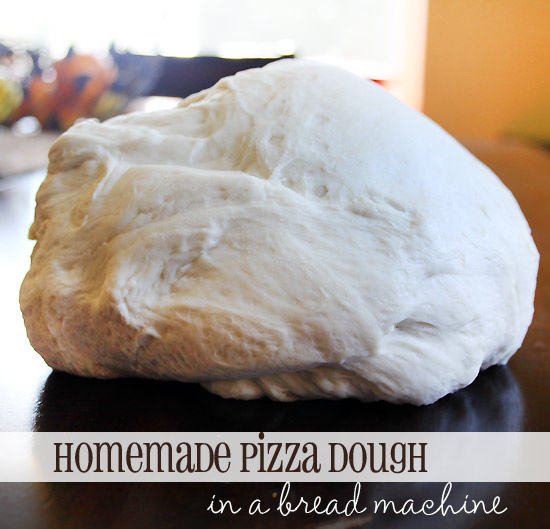
Homemade Pizza Dough in the Bread Machine

Shared May 22, 2016

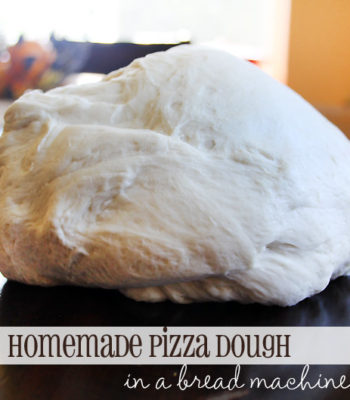
Pizza-Dough-in-Bread-Machine

My grandma makes the best pizza dough. When I visited her last month she shared her recipe with me – it is such an easy pizza dough recipe, I’m kicking myself that I didn’t ask for the recipe sooner!

This pizza dough recipe is made in a bread machine and yields two (2) pounds of dough (enough for a 14-inch pizza). We ended up making two smaller pizzas.

Homemade Pizza Dough in the Bread Machine
 
Save Print
Author: Heather
Recipe type: Pizza
Ingredients
  • 4 Cups all-purpose flour
  • ¾ teaspoon salt
  • 2 teaspoons active dry yeast
  • Costo has the best deal on yeast!
  • 1 and ⅜ Cups water
  • 3 Tablespoons olive oil
Instructions
To make dough:
  1. Toss all ingredients into the bread maker.
  2. Select the “dough” setting on your bread maker. This just mixes the dough, it doesn’t bake it.
  3. Start dough cycle. Mine takes exactly 2 hours. When it’s done, remove from bread maker.
To make pizza:
  1. Roll dough out onto round pizza stone or pan. You may want to grease the pan ahead of time (with olive oil) or possibly use cornmeal.
  2. Preheat oven to 400 degrees F. We like to bake our dough for about 5 minutes before we put any toppings on it, mostly just because we love lots of toppings and the dough can be a bit doughy in the middle without pre-baking a bit.
  3. Add your toppings and bake for a total of 15-20 minutes or until the crust is golden brown!
3.5.3208

Don’t have a bread machine? Check out your local thrift shops – I see used bread machines for sale all the time at my local thrift stores. I think people get tired of storing them. I use mine all the time.Check out bread makers on Amazon – they have some fantastic deals, especially in the summer months when people are less likely to buy them!

What are you favorite pizza toppings? Do you have a favorite pizza dough recipe? 

Comments

Filed Under: Recipes

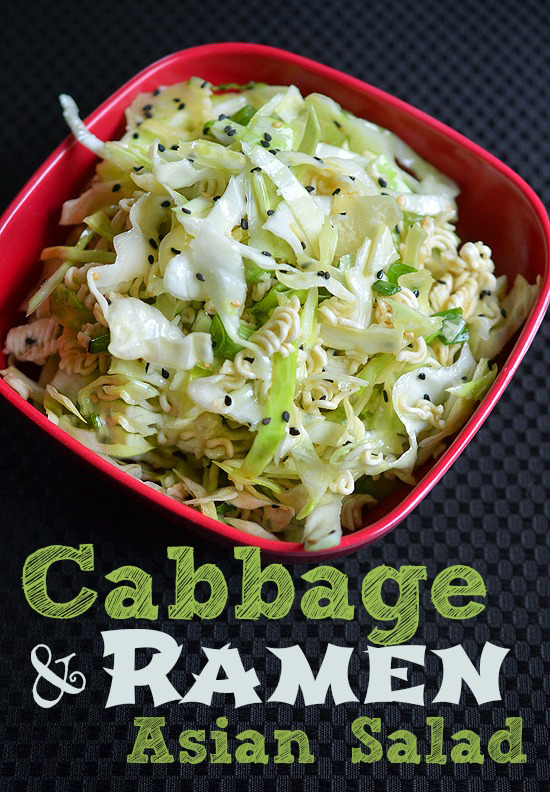
Cabbage and Ramen Asian Salad

Shared May 22, 2016

Cabbage-Ramen-Asian-Salad-Recipe-slaw

I’ve been meaning to make this recipe for awhile and it was so insanely easy I’m wondering why I haven’t done it sooner! This cabbage and ramen Asian salad seems to be a popular salad for potlucks – as that’s pretty much the only place I’ve ever eaten it. But after making it I could see how it would be a great side salad to go with grilled chicken or chicken barbecue sandwiches.

Cabbage and Ramen Asian Salad
 
Save Print
Author: Heather
Cuisine: Salad
Ingredients
  • 1 large green cabbage – shredded into small pieces
  • 6-8 scallions – diced thinly
  • ¼ Cup Mirin (found with Asian foods)
  • ¼ Cup rice vinegar
  • 2 Tablespoons sugar
  • 2 teaspoons salt
  • ½ Teaspoon pepper
  • ⅛ Cup Sesame oil
  • ¼ Cup vegetable oil (I used canola oil)
  • ¼ Cup Toasted Sesame seeds
  • ¼ Cup Black Sesame seeds
  • 2 packages instant ramen noodles – crushed - I found the easiest way to crush these, without making a mess, is to leave inside package and hit with bottle side of large spoon. Be careful not to split the bag. Discard seasoning packet.
  • Optional toppings/additional ingredients – Slivered almonds, sunflower seeds, shredded carrots
Instructions
  1. In a big bowl mix together the sliced cabbage and scallions
  2. In another bowl, mix together the mirin, rice vinegar, sugar, salt, pepper and oils. Whisk well.
  3. Pour over cabbage and slaw. Sprinkle with sesame seeds and ramen noodles.
  4. Serve immediately.
3.5.3208

If making ahead for a potluck or event, keep cabbage, dressing and ramen noodles all separate until right before serving.

I know there are MANY variations to this cabbage ramen salad – if you make this with a different recipe – leave a comment and let me know! 

This recipe was adapted from the Hawaiian-Style Sesame Cabbage Salad from Saveur. 

Comments

Filed Under: Recipes

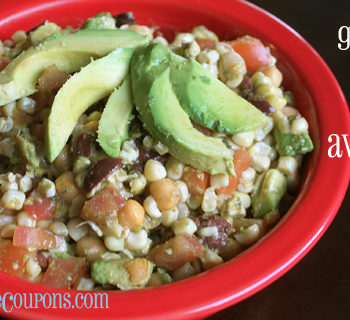
Grilled Corn, Avocado, and Tomato Salad

Shared May 22, 2016

grilled-corn-avocado-salad

Corn on the cob is just coming into season and with sales we’ll be getting it for a quarter or less! This recipe is a great way to make a hearty salad for not a lot of cash! You’ll grill the corn to give it a smoky flavor – mix it up with some avocado, tomatoes, olives and beans and it’s a flavorful salad that’s easy to make.

Grilled Corn, Avocado, and Tomato Salad
 
Save Print
Author: Heather
Recipe type: Salad
Ingredients
  • 3 corn on the cobs, grilled
  • 3 avocados, peeled, pitted, diced
  • 2 tomatos, we used On the Vine tomatoes, diced
  • 1 cup garbanzo beans, drained and rinsed
  • ½ cup kalamata olives, diced
  • ¼ white wine vinegar
  • ¼ cup extra virgin olive oil
  • 1 teaspoon cumin
  • ½ teaspoon paprika
Instructions
  1. Grill corn on the cob. Then cut corn off of cob. We used a fancy tool that I had from my Pampered Chef days that is an actual Corn Cob Kernel Cutter (say that three times fast) but I think a knife will work just as easily.
  2. In a small bowl whisk up the wine vinegar, olive oil, cumin and paprika.
  3. Lightly toss all the ingredients together. The avocados will get mushy – but don’t sweat it, they will still taste good! I think this would be extra special with some bacon sprinkled on top. You could also eat this like a salsa!
3.5.3208

This salad is best eaten the day of – because the avocados and tomatos probably won’t sit well overnight in the fridge. The smoky flavor of the corn, with the smooth avocado and the saltiness of the olives makes for a yummy salad. Hope you like it!

Recipe adapted from Bobby Flay’s Crunchy Avocado salad 

What’s your favorite summer recipe? Let us know – we’d love to try it out!

Comments

Filed Under: Recipes

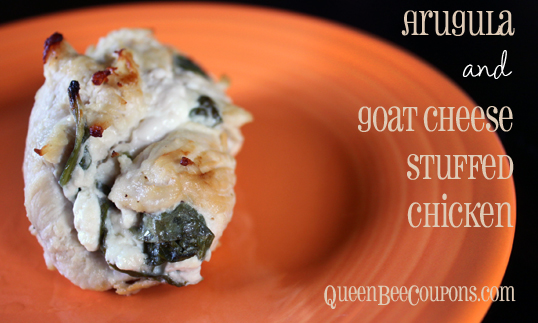
Chicken Stuffed with Arugula and Goat Cheese

Shared May 22, 2016

Arugula-Goat-Cheese-Chicken

We had this for dinner this week – it was our first time making it, but won’t be our last. I have a ton of arugula from our garden, so we’ve been trying to make the most of it. And we had goat cheese in the fridge left over from this Strawberry, Arugula, Goat Cheese salad – so we made chicken stuffed with arugula and goat cheese!

Chicken Stuffed with Arugula and Goat Cheese
 
Save Print
Author: Heather
Recipe type: Chicken
Ingredients
  • Chicken breasts, four
  • Arugula, about 4 ounces
  • Goat cheese (chevre), about 4 ounces (Costco has a Kirkland brand goat cheese that is super affordable!)
  • Olive oil, 1-2 tablespoons
  • Toothpicks
Instructions
  1. Preheat oven to 425 degrees F.
  2. Wash, dry your chicken breasts. Then place on cutting board, lay a piece of plastic wrap across chicken breasts and pound them with the flat side of a meat tenderizer. We just want to thin them out a bit – it’s easier for wrapping.
  3. On a clean surface, layout the chicken breasts and put a layer of arugula leaves on top. Then sprinkle with goat cheese – it will melt and infuse into chicken, so add a little more than you think you should. Start with the narrowest end of the chicken breasts and roll it up. Secure with a toothpick or two.
  4. Using a skillet that is safe for the oven, place skillet on stove and heat oil on medium high heat. Place your chicken rolls into the pan and brown them on all sides.
  5. Finish them off by placing skillet into oven and cook until chicken is cooked through. Probably 10 – 20 minutes. Remove pan from oven (careful – it’s hot!) and remove the chicken from pan. Cover with foil and let it rest for five minutes. Remove toothpicks and serve – either sliced or whole.
3.5.3208

I think there are so many possibilities for this recipe – you could do the same technique with pesto and mozzarella, ham and swiss and . . . ?

What is your favorite thing to stuff inside chicken?

Recipe credit: Simply Recipes

Comments

Filed Under: Chicken, Recipes

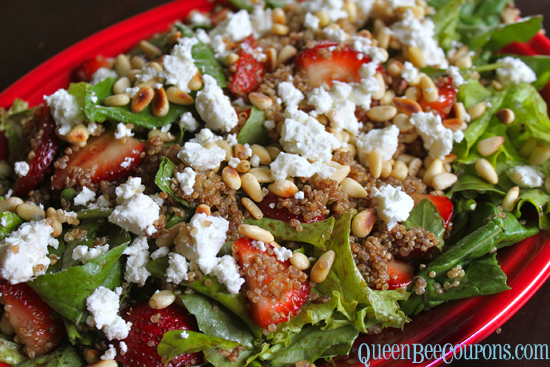
Quinoa, Arugula, Strawberry, Goat Cheese, Pine Nut Salad

Shared May 22, 2016

Quinoa-Strawberry-Goat-Cheese-Salad

We had this for dinner for the first time last night and it was a big hit. We used fresh arugula and lettuce from our garden. We all had second helpings and ate it down to the very last pine nut on the plate. Hope you enjoy it as much as we did!

Quinoa, Arugula, Strawberry, Goat Cheese, Pine Nut Salad
 
Save Print
Author: Heather
Recipe type: Salad
Ingredients
  • Quinoa, about 1 cup before cooking - you can buy this at Costco, a huge bag for about $9-$10
  • Arugula – Trader Joe’s sells this bagged for $1.99 – $2.99. You could substitute regular greens, but I like the spicy flavor of the arugula.
  • Lettuce – I added this just because we had it from the garden
  • Strawberries, sliced
  • Goat cheese, crumbled on top - Costco sells a Kirkland brand goat cheese that is super yummy and affordable. It comes in a two-pack for around $5 or $6.
  • Pine nuts, lightly toasted - these can be expensive, a little bit goes a long way. I recommend checking bulk bins at your local stores or Costco.
  • Balsamic vinegar
Instructions
  1. Make your quinoa (I recommend making in the rice cooker).
  2. Wash and dry arugula and/or lettuce.
  3. Slice strawberries.
  4. Toast pine nuts, I just threw them into a little sauce pan and put on medium-heat until golden brown.
  5. Throw it all together and drizzle with balsamic vinegar. Toss to coat.
3.5.3208

I really hope you enjoy this recipe! The arugula has a little spice to it – mix that with the tartness of the goat cheese, sweetness of strawberries, and the balsamic vinegar I thought it was super delicious.

If you plan to make ahead of time, I would hold off on goat cheese and balsamic vinegar until you are ready to serve.

What are your favorite salad recipes? Do you have a favorite goat cheese or quinoa recipe?

Comments

Filed Under: Recipes

  • « Previous Page
  • 1
  • …
  • 14
  • 15
  • 16
  • 17
  • Next Page »
Happy-Hive-About

Recent Posts

  • How to Clean Stained Cutting Board {Naturally}
  • Homemade play dough using Kool-Aid or Jell-O (preschool teacher and kid approved!)
  • Homemade Hummingbird Food (Nectar)
  • Peanut Butter and Jelly Gelato {Kid-friendly recipe}
  • Spring Cupcake Designs – 6 Easy Spring and Easter Cupcake Designs

Recent Comments

  • Jana Miller on Cottonwood, Jerome, Sedona, Prescott, more {Arizona}
  • Sue Eichler on Cottonwood, Jerome, Sedona, Prescott, more {Arizona}
  • Paris Jeske on Earning a living on the road – How we (and others) are making money while we travel full-time
  • Paris Jeske on Earning a living on the road – How we (and others) are making money while we travel full-time
  • Karen on Healthcare benefits on the road – We break an arm and end up in emergency room!

Recent Posts

  • How to Clean Stained Cutting Board {Naturally}
  • Homemade play dough using Kool-Aid or Jell-O (preschool teacher and kid approved!)
  • Homemade Hummingbird Food (Nectar)
  • Peanut Butter and Jelly Gelato {Kid-friendly recipe}
  • Spring Cupcake Designs – 6 Easy Spring and Easter Cupcake Designs
This error message is only visible to WordPress admins

Error: No feed found.

Please go to the Instagram Feed settings page to create a feed.

Copyright ©2026, A Happy Hive. All Rights Reserved. Custom design by Pixel Me Designs