A Happy Hive

The best in savings, home, food and travel

  • Savings
  • Home
  • Food
  • Travel
  • Savings
    • Grocery
    • Print Coupons
  • Your Home
    • Chicken Coops
    • Gardening
  • Food
  • Travel
  • Earn Money
  • Rise & Shine
  • About
  • Contact Us

Cottonwood, Jerome, Sedona, Prescott, more {Arizona}

Shared May 10, 2016

Cottonwood-Verde-Valley-Arizona

Travel dates – April 11 – April 18, 2016

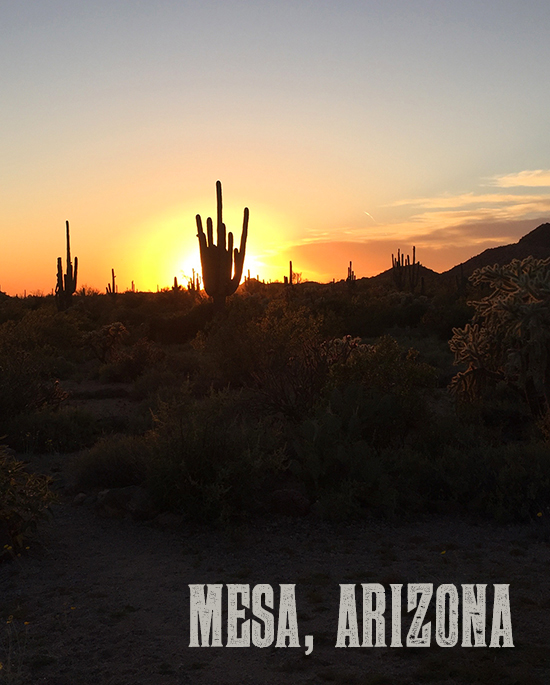
After staying for so long in Mesa, Arizona we headed north a couple hours to Cottonwood, Arizona to spend nearly a week. Cottonwood, Arizona is centrally located for exploring a lot of popular areas including Prescott, Jerome, Sedona, Tuzigoot National Monument and Montezuma National Monument. The first part of our week in the Cottonwood area we stayed at Dead Horse Ranch State Park. . . .

Dead-Horse-Ranch-State-Park-our-spot

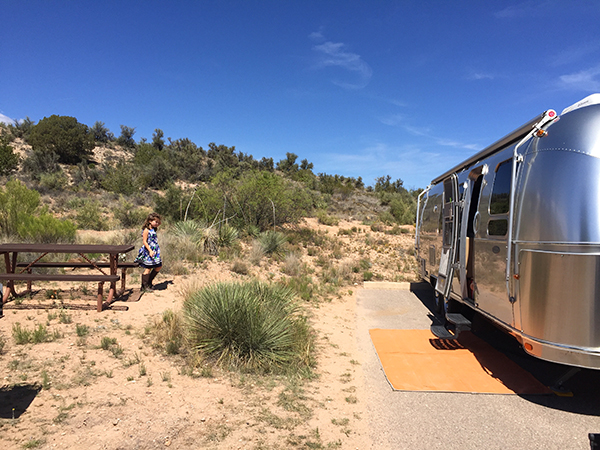
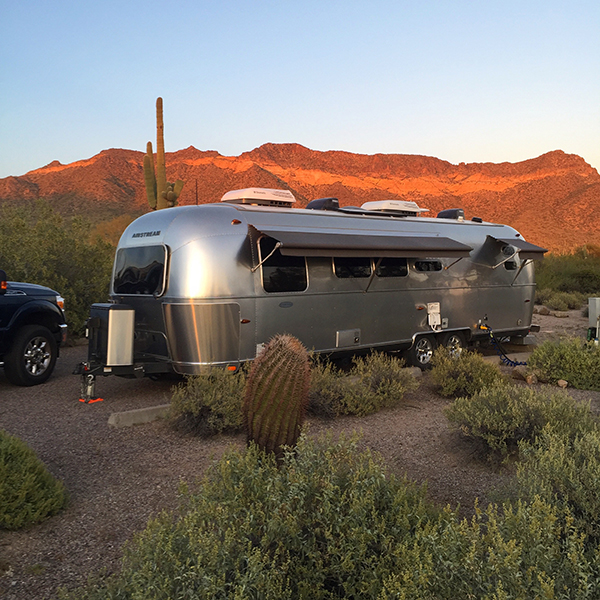
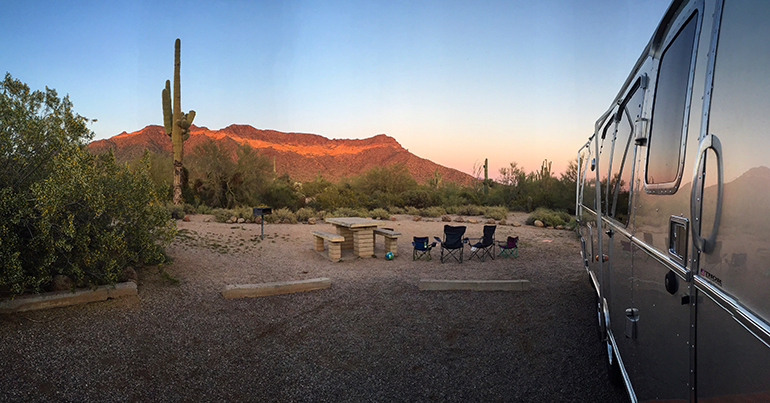
Let’s talk a little about Dead Horse Ranch State Park – it is a very nice state park! Our spot was level, the campground was clean and there were some great trails in the area. At $30/night our back-in spot had water and 50-amp electric.

Dead-Horse-Ranch-campground-spot

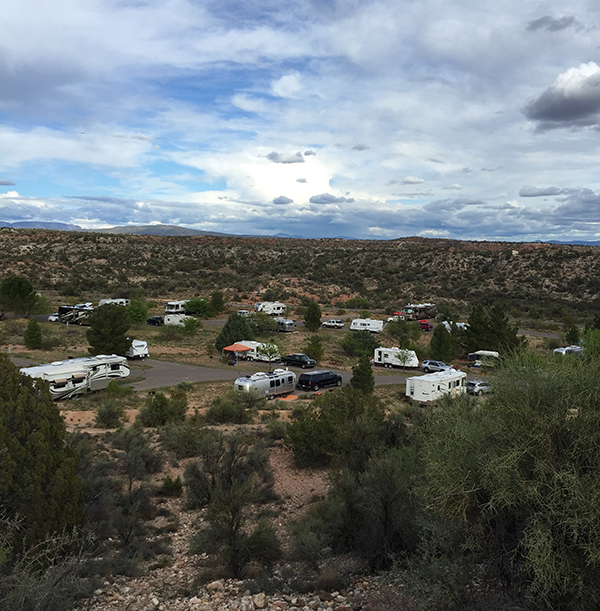
This is the view from up on the hill behind our trailer and campsite at Dead Horse Ranch State Park – where there is a nice short trail with some nice views. There were 3 or 4 other Airstreams in our same loop while we were there.

Dead-Horse-Ranch-State-Park-lake

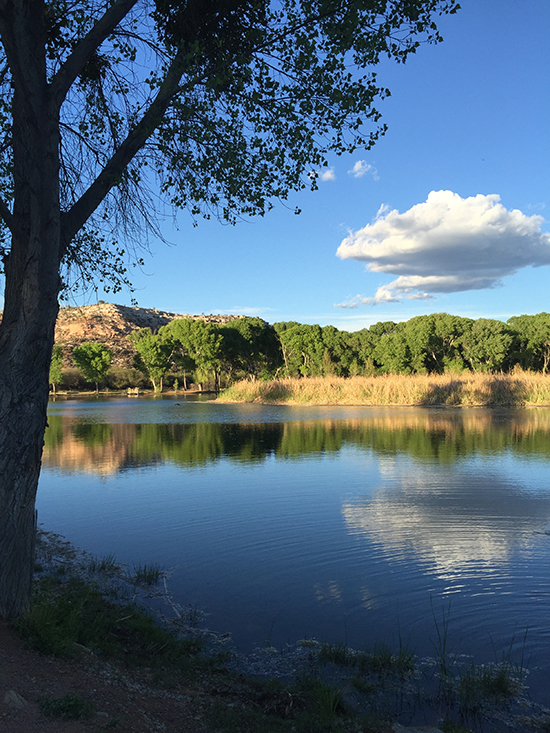
There was so much to explore in the area that we didn’t spend near enough time in the state park but we did discover a beautiful set of lakes with lots of people fishing from the shore. If we were going to spend more time in the area we would have probably paid for fishing licenses and spent many an afternoon here!

Tuzigoot-View-looking-down

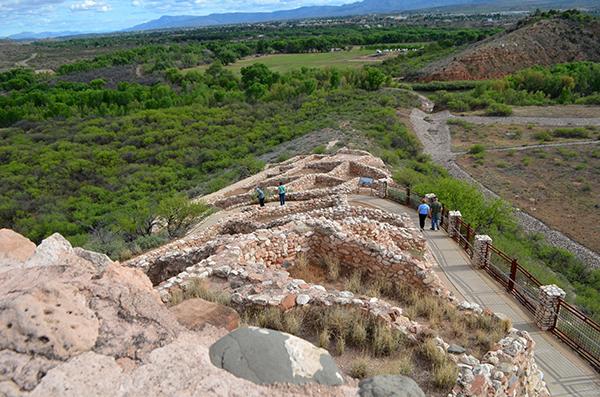
Our first day in Cottonwood, we got settled into Dead Horse Ranch State Park early and we headed to the nearby Tuzigoot National Monument. It’s a short 10 minute drive away! Tuzigoot is an ancient pueblo, built by the Sinagua people between 1125 and 1400 CE.

Continue Reading…

2 Comments

Filed Under: Arizona, Destinations, Travel

Slow Cooker Salsa Verde Beef Recipe

Shared May 3, 2016

Crockpot-slow-cooker-salsa-verde-beef

This slow cooker salsa verde beef recipe apparently makes “the best tacos I’ve ever had,” per my handsome husband. He said this and I found myself slightly offended, and I replied, “But I’ve made you so many tacos. . . ” And he replied with a smile, “Well you made these, too.”

In the nearly 10 years I’ve been married to this man, he’s never complained, ever, about a meal I’ve made. At worse, he’ll just eat it and be done (bless him for that). He’s always complementary, even when I know he’s fibbing just to make me feel appreciated for cooking a meal. But I don’t think I’ve ever heard so many compliments about any particular recipe. Really. It was a hit.

So yes, I can pretty much plan on making this Slow Cooker Salsa Verde Beef recipe many times again, since now every other taco recipe I have up my sleeve will be compared to the “best taco recipe I’ve ever had,” declaration. They were really good, I agree. Even my kids had seconds.

I think this would be an wonderful recipe to make for a taco bar if you want to take it up a notch from the typical hamburger tacos. Taco bars are great ways to serve lots of people with a meal that allows them to adapt it with the toppings they like. Or make these into nachos for a party-size appetizer.

Crockpot Slow Cooker Salsa Verde Beef
 
Save Print
Prep time
15 mins
Cook time
8 hours
Total time
8 hours 15 mins
 
Author: Heather
Recipe type: Crockpot
Ingredients
  • 3-pound boneless rump or chuck roast, cut into 1.5 inch cubes
  • ½ Cup diced onion
  • 1 Tablespoon chili powder
  • ½ tsp cumin
  • ½ tsp garlic powder
  • 1 tsp salt
  • 1 cup salsa verde (you know, salsa that is green) - I used mild, use whatever spice level you’d like
  • 1 Tablespoon olive oil
Instructions
  1. Heat oil in a large skillet. Add beef cubes and brown all sides. Work in batches if you have to.
  2. Transfer meat to 5-quart slow cooker. Add onions to the drippings in the skillet and saute until they are slightly brown. Stir in the spices and cook for about one minute. Add the salsa and stir, scraping up any brown bits.
  3. Add this salsa, onion, seasoning mixture to the beef in the slow cooker. Cook on low for 6-8 hours or high for 4 hours. The meat should be very tender and shred easily when it’s stirred.
3.5.3208

We hope you love this recipe as much as we do. Leave a comment if you try it and let us know what you think!

Comments

Filed Under: Food, Recipes, Slow Cooker Tagged With: Beef, Crockpot, Slow Cooker

Slow Cooker Chicken Tortilla Soup

Shared May 3, 2016

Slow-Cooker-Tortilla-Soup-Recipe

This Slow Cooker Tortilla Soup is very, very easy and super hearty. You can serve it with tortilla chips or homemade cornbread. The liquid cooks down and it become very chunky (which I like) so if you like a runnier soup add more chicken broth.

Slow Cooker Tortilla Soup
 
Save Print
Prep time
10 mins
Cook time
8 hours
Total time
8 hours 10 mins
 
Author: Heather
Recipe type: Soup
Ingredients
  • 4 chicken breasts (I used frozen chicken breasts)
  • Two (2) 15 oz cans black beans, drained and rinsed
  • Two (2) 15 oz cans diced tomatoes
  • 1 Cup salsa
  • 1 4 oz can of green chilies
  • 1 teaspoon of cumin
  • 1 Cup of frozen corn
  • One (1) 15 oz can of chicken broth
  • Plus tortilla chips and shredded cheddar cheese
Instructions
  1. Combine all ingredients except chips and cheese in slow cooker (a six-quart slow cooker works best).
  2. Cook on low for 8 hours (since I used frozen chicken breasts I cooked mine on high).
  3. Before serving, remove chicken, shred and return to slow cooker. Serve over crushed tortilla chips and add shredded cheese to taste.
3.5.3208

I hope you enjoy this recipe. Please leave a comment and let me know if you give it a try!

Comments

Filed Under: Chicken, Food, Recipes, Slow Cooker

Spanish Rice in Rice Cooker

Shared May 3, 2016

Spanish-Rice-in-Rice-Cooker

Rice is an inexpensive ingredient that can really stretch the number of servings you can get from a batch of tacos, burritos or fajitas. And making spanish rice in your rice cooker could not get any easier! I love that it doesn’t have a lot of sodium and MSG like a many of the boxed varieties do. Once you see how easy it is and how delicious it tastes, I think you’ll have a difficult time going back to the boxed brands.

And it’s so flexible – we had this rice with a little shredded cheese and sour cream wrapped in a tortilla for lunch today!

Spanish Rice in Rice Cooker
 
Save Print
Prep time
5 mins
Cook time
35 mins
Total time
40 mins
 
Author: Heather
Recipe type: Side dish
Serves: 3 cups
Ingredients
  • 1½ cups uncooked white rice (any long grain will work, I used Basmati)
  • 1½ cups chicken broth
  • 1 can of Rotel tomatoes - You can buy this at various spice levels
  • 2 tablespoons of melted butter
  • 1 teaspoon cumin
  • Optional: You could probably throw in a 4 oz can of chili peppers. I haven’t tried this.
Instructions
  1. Toss everything into rice cooker. Give it a good stir. Close the rice cooker lid. Press the cook button and walk away until it’s done. Usually takes about 30 minutes.
  2. Fluff rice and give it a good stir before serving
3.5.3208

It’s that easy! I hope you love this Spanish Rice recipe as much as we do.

Comments

Filed Under: Food, Recipes Tagged With: Rice, Rice cooker, Spanish Rice

Raised Beds – How to build raised garden beds for about $35 each

Shared May 3, 2016

Build-Raised-Beds-for-cheap

Raised Bed Tutorial

I’ve dreamed of raised beds for years – but I was intimidated by the idea of building something. Intimidated by the cost. But in Spring 2012 we jumped in head first and we built our first raised garden bed – in an afternoon – and I realized just how easy and inexpensive they can be! We now have six raised beds that provide a bounty every summer and I’m so grateful that we went for it!

This tutorial is based on what we did to build our raised beds – but we don’t proclaim to be experts.

The price. I know there are probably cheaper ways to make these. I wanted a mixture of simple design, easy to acquire supplies (no stalking Craigslist or driving 30 miles for “free wood”) and frugal. I built two 8×4 raised beds and one 8×2 with an average cost of about $35 each, which I think is completely reasonable considering the bounty that will hopefully come from these and the years they will last. AND it’s about half of the going rate that I found for pre-built raised beds on Craigslist or the kits at Home Depot.

DIY-Raised-Garden-Beds

The design. I’ve spent plenty of time over the last two years reading online tutorials. I went with the easiest method and design possible (in my opinion). I had Home Depot even pre-cut my wood, so I wouldn’t have to bother. It was SIMPLE.

I’m no expert. My raised bed resume is short. This is it. I don’t pretend to be an expert and if you’re looking for a tutorial that would be certified by someone with a Bachelors in Raised Beds – this isn’t it. But I’ll share what we did, in hopes that it’s helpful.

Continue Reading…

Comments

Filed Under: Gardening, Home

How to Earn Money by Selling Used Books on Amazon

Shared May 3, 2016

How-To-Sell-Books-Amazon

Selling used books on Amazon

As part of Project Downsize, I’m selling my beloved cookbook collection on Amazon. By selling your used books on a platform like Amazon.com – you can reach millions of people and ask a reasonable selling price, instead of the $2 you might get from selling your book at a garage sale.

I am such a fan of Amazon’s used selling structure – it has served our family well over the last decade. That’s right – nearly 10 years ago my husband and I started selling our used text books on Amazon. We were newly married, just out of college (with a heap of student loans) and working entry level jobs. Selling our college textbooks on Amazon morphed into a full time book business – at one point we had more than 3,000 books listed for sale on Amazon. We’d spent our weekends (before kids) scouting book sales, garage sales and thrift stores, looking for used books – which we turned around and sold on Amazon. We made enough doing this to pay for my husband’s Master’s in Education degree – with cash, no loans! And it helped us supplement our income when we needed it most.

After we had kids, it was too difficult to spend hours hitting book sales and thrift shops, so we eventually got out of the “business” of selling used books online. But the platform for selling books is still the same – and you’ll find that there are hundreds of people across the country doing this as a full-time income.

Selling-Books-On-Amazon-How-to

Why I like selling books ::

  • Books are EASY resale items. Unlike antiques, clothing, shoes, decor there is no research needed to find the value of a book. Every book has an ISBN on the back cover and that’s all you need to find the going price.
  • Books are EASY to ship. Unlike other merchandise – books are predictable. You need a collection of padded envelopes – no bubble wrap, box sizes or crazy shipping costs.
  • Books are INEXPENSIVE to ship. Books (and other forms of media) have their own postage rate, it’s called Media Rate, and it’s cheaper than most other kinds of shipping.

Continue Reading…

Comments

Filed Under: Earn Money Tagged With: Amazon, Earn money

Healthcare benefits on the road – We break an arm and end up in emergency room!

Shared May 3, 2016

Healthcare-benefits-on-road-emergency

Healthcare benefits on the road

I like to post things chronologically and lately I’ve been a few weeks behind on the blog posts (always watch our Instagram account for real-time travel updates). But I thought I’d jump ahead to talk about a big event that happened last week on the road – Hadley broke her arm! My sweet, adorable girl broke her humerus (the long bone in the upper arm). Let me tell you about it. . .

Playing-Lone-Rock-Beach-Powell

We were enjoying an amazing spot at Lone Rock Beach on Lake Powell. It was beautiful and the kids had so much room to run around and play that it made me so happy. To make things even better – we were traveling with one of our favorite families (@upintheairstream on Instagram) so not only did the kids have an epic place to play, but they had some of their best friends to play with. Things were going so well and I was so happy to see them run, smile, laugh, play and be outside. They were falling into bed exhausted and happy every night – what more could a mom ask for?

Our last night at Lone Rock Beach the kids were playing in the “fort” they created on the beach. It was a hole of sorts near the water. Liam jumped into the fort and Hadley followed closely behind – as she often does. She landed wonky – on her elbow, on harder, wet sand and was instantly in pain. I knew something wasn’t right because she’s such a tough cookie – she rarely cries when she gets hurt. . .but she was in pain and it quickly swelled up. We iced it right away and I found the nearest Urgent Care facility in Page, Arizona (about 20 minutes away). They closed at 6 p.m. and we got there at 5 p.m. – but they didn’t have an x-ray machine! So they sent us across the street to the Page Hospital Emergency Room.

Page-Hospital-waitingThe silver lining of the ER was they had cable so Hadley got to watch the Disney channel. 🙂  

The hospital in Page was amazing – they got us right in, did x-rays and quickly confirmed she had broken her humerus near the growth plate in her elbow. We explained we were headed to St. George, Utah the next day (a MUCH bigger metro center) and they referred us to an orthopedic doctor there. It was a good thing that we were already planning to head to a metro area – because Page is such a small community they had to send our x-rays to PHOENIX to get them reviewed! The emergency room staff put Hadley in a temporary cast and sent us home with after-care instructions.

Hadley-Ortho-Office
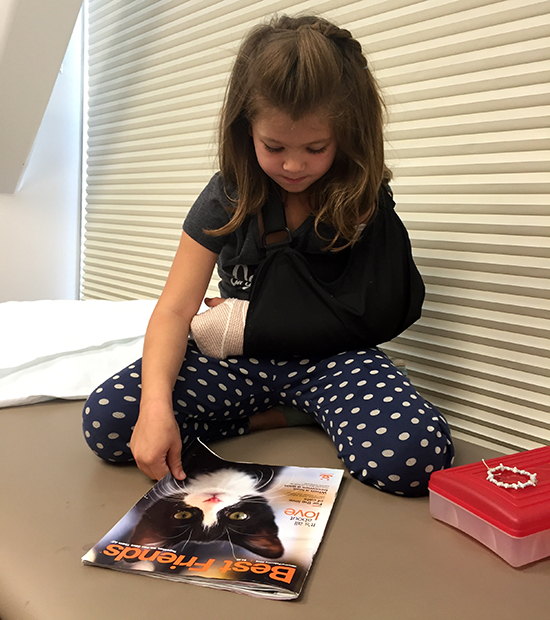
Hadley looking at a pet adoption magazine at the orthopedics office. Now she wants a dog. 🙂

We got a call from the orthopedic doctor in St. George and he recommended surgery on Friday. Before this accident I had no idea a kid could need surgery for a broken arm! But because the break was so close to the growth plate, surgery was the best care option for her. I spent a half-day on the phone calling our insurance company and considering our options. . . Do we fly home to Washington for the surgery? Do we have the surgery here? Can we drive home in time to get surgery? What was the best choice for Hadley?

Continue Reading…

21 Comments

Filed Under: Arizona, Destinations, Healthcare, Travel, Utah Tagged With: fulltime traveling benefits, health benefits when traveling full time, health care benefits

Lots of wonderful FAMILY TIME in Mesa {Arizona}

Shared April 30, 2016

Mesa-Arizona-Family-Time

Travel dates :: March 18 – April 11

We spent a solid THREE weeks in Mesa, Arizona – one of the LONGEST times we’ve spent anywhere since we started this journey. I thought we might get bored, but honestly it went by too fast. We left Tucson and pulled into Mesa around March 18 with reservations at Monte Vista RV Resort, I told you all about that here (we loved it)!

Usery-Regional-Camping-view

After Monte Vista we moved over to Usery Regional Park with a 2-week reservation! Just a short 20 minutes from my Grandma’s house in Mesa we had actually been to Usery for a hike on a past vacation in 2013 (see how young my kids are and a little bit about our hike there)! Based on our previous visit we knew we would love camping here.

Usery-Regional-Park-large-camping-sites

Our spot was HUGE and gorgeous. Sweeping views of the mountain behind us and lots of room for the kids to run around and play. We have a set of rubber baseball bases and the kids set up a baseball field as soon as we got situated. Our spot was a bit far from the bathrooms – which was tricky since we didn’t have sewer hook-ups, but we managed to only have to dump ONE time in those 2 weeks – YAY! Cost for this campground is $30/night.

Desert-Survival-Arizona-Usery-class
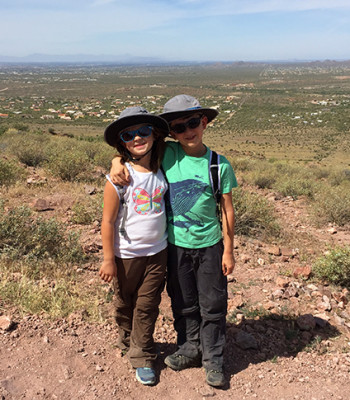
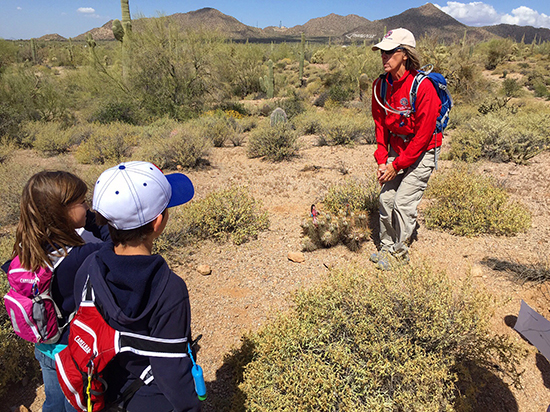
Kids taking a Desert Survival Course

Usery Regional Park has some fantastic volunteer-led educational programs. Our kids did two classes during our stay – a Desert Survival course that covered how to safely hike in the desert and a What Lives in the Holes? course that shared about all the little critters that live underground in the dessert.

Continue Reading…

3 Comments

Filed Under: Arizona, Destinations, Travel

Slow Cooker Quinoa Chicken Chili

Shared April 17, 2016

Slow-Cooker-Quinoa-Chili-ChickenSlow Cooker Quinoa Chicken Chili

I’m not sure whether I’d call this Quinoa Chicken Chili or Quinoa Taco Soup – either way, I’d call it scrumptious. Quinoa is very high in protein, so it goes great in this chicken chili to help give it some heft and substance.

Slow Cooker Quinoa Chicken Chili Recipe
 
Save Print
Prep time
15 mins
Cook time
7 hours
Total time
7 hours 15 mins
 
Author: Heather
Recipe type: Slow Cooker
Ingredients
  • 1 cup of quinoa, rinsed
  • One (1) 28 oz can of diced tomatoes (you could use crushed)
  • One (1) 14 oz can diced tomatoes with green chilies (Rotel)
  • Two (2) 16 oz cans of black beans, rinsed, drained
  • One (1) 15 oz can of corn, drained
  • 3 Cups chicken stock
  • 2 large chicken breasts, frozen or thawed (cook longer if frozen)
  • 1 tsp garlic powder
  • 2 tsp cumin
  • 1 tsp crushed red pepper
  • 2 tsp chili powder
Instructions
  1. Toss everything into slow cooker and cook for 6-8 hours on low or 4-7 hours on high. I added frozen chicken breasts to mine and cooked on high for about six hours. As long as the chicken is cooked – it’s done!
  2. Remove chicken and shred it with two forks. Return to slow cooker.
  3. Top with cheese, sour cream, avocados – whatever sounds good to you! I’m thinking the next day it would probably thicken up enough to eat in a whole wheat tortilla.
3.5.3208

Crockpot-Quinoa-Chili

I’d love to know what you think about this recipe! Leave a comment and let me know!

Comments

Filed Under: Food, Recipes, Slow Cooker Tagged With: Chicken, Chili, Crockpot, Quinoa, Slow Cooker

Our favorite fulltime outdoor RV accessories

Shared April 4, 2016

RV-Accessories-fulltime-RV

About a month ago we shared a post about our favorite RV appliances and gadgets that we use inside the trailer. We thought it’s about time we share some of our favorite RV accessories that we use outside when we set up camp!

Surge-Guard-RV-airstream

TRC 34750-001-LCD 50 Amp Surge Guard – The TRC 34750-001-LCD 50 Amp Surge Guard automatically shuts off power to your trailer if there is a sudden change in voltage (like a power surge or low voltage that could potentially damage your trailer). Electrical connections in RV parks aren’t always the most stable and this is a line of defense between the electrical connection and your trailer’s electrical system. We know people who have surge guards and people who don’t – depending on who you talk to you’ll likely get different recommendations about whether this is truly a necessity. We were on the fence and asked our local Airstream repair shop (Seattle, who we love) if they thought we needed one and they said they’d suggest it based on damage they’ve seen to trailers without surge protectors.  In the end we decided that $400 was worth it – especially if it saves our trailer from a major electrical failure. Seems like a minor investment for trailers that can costs thousands. We found the best price was on Amazon. We use this EVERY TIME we plug in to shorepower and we’ve had it trip only a couple times and overall we’re glad we have it. If you have a 30-amp trailer the 30-amp surge guard is less expensive.

X-Chock-RV-Airstream

X-Chock Wheel Stabilizer – We recently got a two pack of the X-Chock Wheel Stabilizers and we’ve been really pleased with them. They provide trailer stabilization by providing opposing forces against the wheels. It also has the ability to have a padlock installed that helps with theft prevention. This seems to provide more stability than the wheel chocks alone.

Continue Reading…

2 Comments

Filed Under: Day-to-Day Living, Planning, Travel Tagged With: coleman camping chair, favorite RV accessories, grill, lynx levelers, sewer hose, surge guard, x-chocks

  • 1
  • 2
  • 3
  • …
  • 11
  • Next Page »
Happy-Hive-About

Recent Posts

  • How to Clean Stained Cutting Board {Naturally}
  • Homemade play dough using Kool-Aid or Jell-O (preschool teacher and kid approved!)
  • Homemade Hummingbird Food (Nectar)
  • Peanut Butter and Jelly Gelato {Kid-friendly recipe}
  • Spring Cupcake Designs – 6 Easy Spring and Easter Cupcake Designs

Recent Comments

  • Jana Miller on Cottonwood, Jerome, Sedona, Prescott, more {Arizona}
  • Sue Eichler on Cottonwood, Jerome, Sedona, Prescott, more {Arizona}
  • Paris Jeske on Earning a living on the road – How we (and others) are making money while we travel full-time
  • Paris Jeske on Earning a living on the road – How we (and others) are making money while we travel full-time
  • Karen on Healthcare benefits on the road – We break an arm and end up in emergency room!

Recent Posts

  • How to Clean Stained Cutting Board {Naturally}
  • Homemade play dough using Kool-Aid or Jell-O (preschool teacher and kid approved!)
  • Homemade Hummingbird Food (Nectar)
  • Peanut Butter and Jelly Gelato {Kid-friendly recipe}
  • Spring Cupcake Designs – 6 Easy Spring and Easter Cupcake Designs
This error message is only visible to WordPress admins

Error: No feed found.

Please go to the Instagram Feed settings page to create a feed.

Copyright ©2025, A Happy Hive. All Rights Reserved. Custom design by Pixel Me Designs