A Happy Hive

The best in savings, home, food and travel

  • Savings
  • Home
  • Food
  • Travel
  • Savings
    • Grocery
    • Print Coupons
  • Your Home
    • Chicken Coops
    • Gardening
  • Food
  • Travel
  • Earn Money
  • Rise & Shine
  • About
  • Contact Us

Slow Cooker Strawberry Applesauce

Shared June 8, 2016

Slow-Cooker-Strawberry-Applesauce

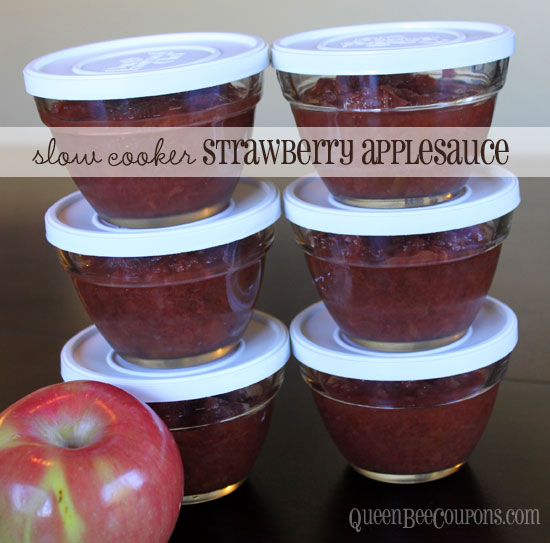
This slow cooker Strawberry Applesauce recipe has been a huge hit with my kids and I love it because it’s so darn easy. I searched all over online for a slow cooker strawberry applesauce recipe that I liked and I couldn’t find one – so I made this one up using ingredients I had on hand at the time.

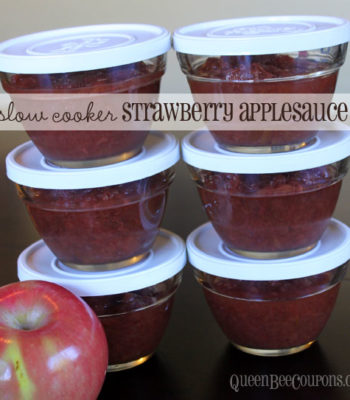
After I let it cool overnight in the fridge I put it into one-cup size, sealed containers to make it an easy snack.

Slow Cooker Strawberry Applesauce
 
Save Print
Author: Heather
Recipe type: Fruit
Ingredients
  • Apples – about three (3) pounds. I used a combination of Gala and Granny Smith apples.
  • Strawberries – about one (1) pound, I used frozen and I didn’t measure it out exactly. I probably could have used less. If you want just a hint of strawberry flavor, use ½ pound
  • Orange juice, ⅓ cup
  • Brown sugar, 2 Tablespoons
  • Juice from one large lemon, which came to about ¼ cup for me
  • One whole cinnamon stick
  • Vanilla, 1 teaspoon
Instructions
  1. Peel apples. I didn’t do this the first time and I really wish I had.
  2. Cut apples into slices. The size doesn’t really matter – it will all be mush in a matter of hours.
  3. Throw apples into slow cooker.
  4. Add all the other ingredients to the slow cooker.
  5. Cook on low for about 8-10 hours.
3.5.3208

It made about 1.75 quarts of apple sauce for me. I put it in fridge overnight to cool and then separated it into smaller containers for snack time.

Do you make your own apple sauce? What’s your favorite recipe?
Comments

Filed Under: Recipes, Slow Cooker

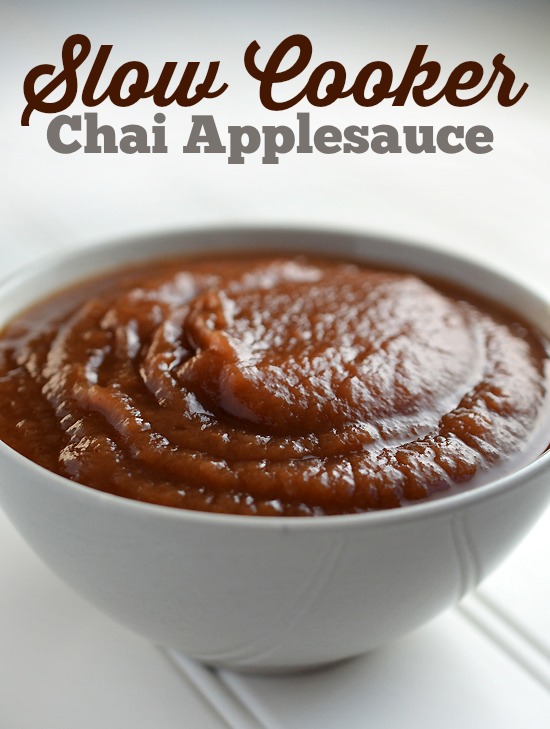
Slow Cooker Chai Spiced Applesauce

Shared June 8, 2016

Crockpot-Applesauce-Chai

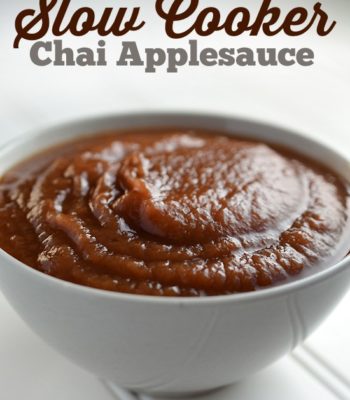
This Chai Spiced Applesauce is awesome sauce, if you ask me. It’s packed with the scrumptious flavors of fall and it it’s incredibly easy to make! My chai spiced applesauce turned out a bit darker than I expected – but I think it’s due to the cinnamon and brown sugar, and I used the immersion blender to make it smooth – including even the cloves. Or it could be that I left it cook for way too long because of basketball practice (this is real life, my friends). Even with the extra cook time it tastes super duper.

Slow Cooker Chai Spiced Applesauce
 
Save Print
Author: Heather
Recipe type: Fruit
Ingredients
  • 8 lbs of apples – peeled cored and cut into large chunks. I did slices – because I have something similar to this Apple And Potato Peeler, Corer, and Slicer and I processed them using that to save time.
  • 1½ tsp vanilla extract
  • 1 tsp cinnamon
  • 1 tsp ginger
  • ½ tsp cloves
  • ½ tsp orange rind (I used zest)
  • 3 – 5 tsp brown sugar - Stephanie says she didn’t use sugar because she used Gala apples, which are sweet enough that the applesauce doesn’t need any extra sugar. If you’re using tarter apples might want to add sugar. I, in true form, didn’t read this all the way through and added sugar to my gala apples. It still turned out delicious.
Instructions
  1. Combine all your ingredients in a 6-quart slow cooker. Cook on low for 6 hours. If you like it chunky, mash it up with a potato masher. If you like it smoother, use an immersion blender.
  2. Refrigerate and enjoy.
3.5.3208

I used an immersion blender (like this one – Cuisinart Smart Stick 2-Speed Immersion Hand Blender)  – because I’m a Type A personality, k? I like things smooth and integrated and uniform. I’m neurotic, you already know this. Chunky or smooth, I don’t think you can go wrong.
(This recipe is adapted from a recipe from Oh My Veggies!)

Comments

Filed Under: Recipes, Slow Cooker

Red Hot Applesauce

Shared June 8, 2016

Hot-Cinnamon-Applesauce

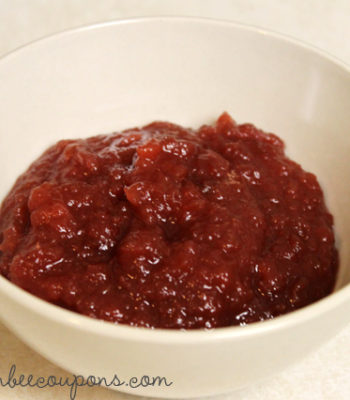
Alicia sent in this recipe for Red Hot Applesauce. We actually made it in the crockpot and let it simmer on low most of the day – our house smelled delicious. This is a very sweet applesauce and very cinnamon-y, I think it definitely falls into the dessert category. The color is vibrant bright red, perfect for the holidays.

Here’s what Alicia wrote:

I wanted to share with you one of my favorite recipes that my family likes to have during the holidays. It was brought to our attention by my great grandmother who is no longer with us, but we still have it in her honor since it is tradition now. My brother loves it so much that sometimes I can it and send him some when I have extra apples. Enjoy!

Now on to the recipe. . . 

Red Hot Applesauce
 
Save Print
Author: Heather
Recipe type: Fruit
Ingredients
  • 8 apples, granny smiths are good
  • ¾ cup red cinnamon candies - We ended using about ½ cup and it worked just fine for us. Add more if you want more cinnamon!
  • ½ cup sugar or sugar substitute, such as Splenda
  • ¾ cup water
Instructions
  1. Core the apples, but it isn’t necessary to peel them.
  2. Dice them up into fine chunks
  3. Put all ingredients into a large pot and bring to a boil
  4. Reduce to the slowest simmer
  5. Cover, stirring occasionally, until you reach the consistency you want (the longer, the finer texture) – about three hours
  6. *OR* put all ingredients into crockpot and simmer on low for six hours.
3.5.3208

What’s your favorite way to make applesauce?

Comments

Filed Under: Recipes

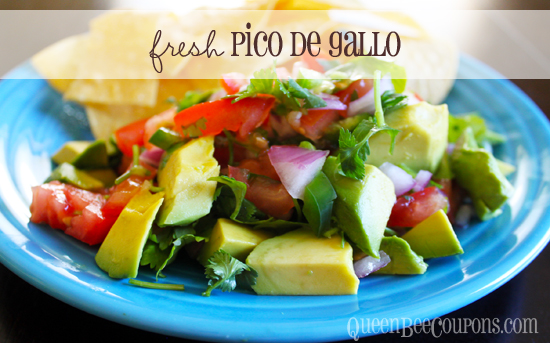
Homemade Pico de Gallo

Shared June 8, 2016

Pico-De-Gallo

Fresh tomatoes are just around the corner. . .which means so is fresh pico de gallo (also known as fresh salsa)! It’s one of my favorite recipes to whip up and the flavors are a million times better than you’ll ever find in store bought salsa, promise. It’s a recipe you can’t really screw up – just add more of the ingredients you like and less of the foods you don’t.

Homemade Pico de Gallo
 
Save Print
Author: Heather
Ingredients
  • 4-5 fresh tomatoes – I used tomatoes on the vine, but varieties with fewer seeds are good
  • ½ – 1 cup cilantro
  • ½ – 1 whole onion – I used red because it’s a milder flavor, but any onion will do.
  • 2 limes
  • 2 garlic cloves, minced
  • 1 fresh jalapeno pepper
  • I strongly advise having a pair of disposable plastic/latex gloves for de-seeding the jalapeno.
  • Optional: Avocados, Mangos
Instructions
  1. Wash and dry all your vegetables.
  2. Dice tomatoes and onion up. You can go super chunky or you can start with putting the tomato chunks into the food processor or blender if you like it a bit more runny. Toss into a large bowl.
  3. Put on plastic gloves and slice jalapeno in half. Pull out all the seeds inside and discard. (The gloves protect you from getting the seed residue and juice under your finger nails and on your skin – which can be hard to wash off. I’ve rubbed my eyes a long time after making it before and ended up with burning eyeballs – not fun.) Dice very small. It’s hard to know how much punch the jalapeno will have until you try the salsa – you can always start with half and add more if you want it spicier. Add diced jalapeno to bowl.
  4. Juice two limes, add juice to bowl.
  5. Mince two garlic cloves, add to bowl.
  6. Finely dice cilantro and add to bowl.
  7. Salt and pepper to taste!
  8. Mix it up! And enjoy immediately with chips or toasted pitas. I recommend splurging and spend $1-2 more bucks for locally sourced tortilla chips. If you’re in Thurston County area we have a couple different chip companies – one in Shelton and one out in Aberdeen that make great chips – which you can find at the farm stands, the Co-op and fancy stores like the Bayview.
  9. Optional – I like to add avocados to mine, but I recommend making the salsa without the avocados and adding them in as you eat it. This way, if you have leftover salsa, you can just pop it in the refrigerator without the avocado, as those don’t tend to keep well after they are cut.
3.5.3208

There are a million different variations on this – I’d love to hear yours! What’s your favorite way to make pico de gallo? What is your favorite way to eat it – with chips or do you use something else?

(Thanks to my mother-in-law for her recipe!)

Comments

Filed Under: Recipes

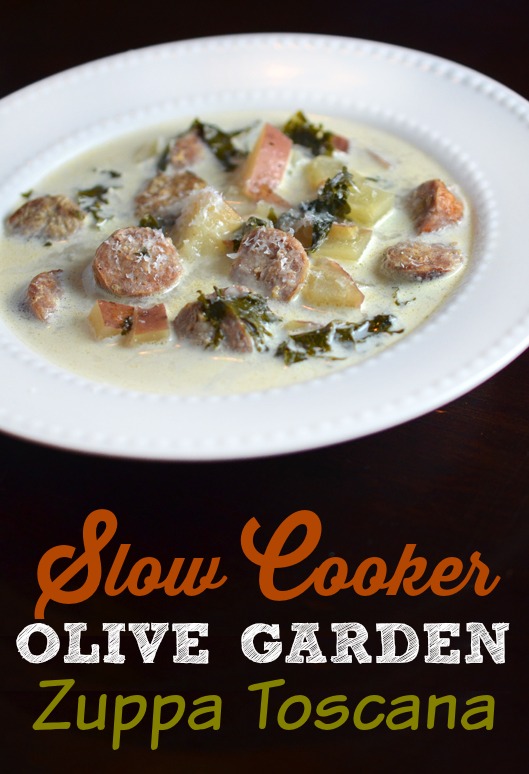
Slow Cooker Olive Garden Zuppa Toscana

Shared June 7, 2016

Olive-Garden-Zuppa-Toscana-Soup-Crockpot

If you’re a fan of Olive Garden’s Zuppa Toscana soup – this recipe is for you! Zuppa Toscana is Olive Garden’s popular sausage, potato and kale soup. This version is made in the slow cooker and it’s ingredient list is so simple it’s a little ridiculous.

Slow Cooker Olive Garden Zuppa Toscana
 
Save Print
Author: Heather
Recipe type: Soup
Ingredients
  • Mild italian sausage – 1 pound
  • Low Sodium Chicken Broth – 64 oz, plus 1 can of regular chicken broth, if needed
  • Potatoes – 4 to 5 medium size potatoes, scrubbed and diced finely with skins - It’s recommended to use Yukon, but I used red potatoes and thought it tasted great!
  • Heavy cream – ½ cup
  • Kale – 1 to 1.5 cups bit-size kale
  • Parmesan – grated, to taste
Instructions
  1. Set slow cooker to high temperature. Add chicken broth to your slow cooker,
  2. On the stove top, in a skillet, brown the sausage over medium heat. Cook until no longer pink. Drain half of the fat.
  3. Add sausage to the slow cooker with the broth.
  4. Add diced potatoes to the slow cooker. Stir well.
  5. Cook on high for 3.5 to 4 hours.
  6. About 30 minutes before serving, add heavy cream and your bite size pieces of kale. Stir well and do not open again until serving.
  7. Garnish with shredded parmesan or other favorite cheese.
3.5.3208

Need a Slow Cooker? I’ve found the best places to look are Costco and Amazon in terms of price and quality.  See all the current slow cookers available on Amazon at this time.

Comments

Filed Under: Recipes

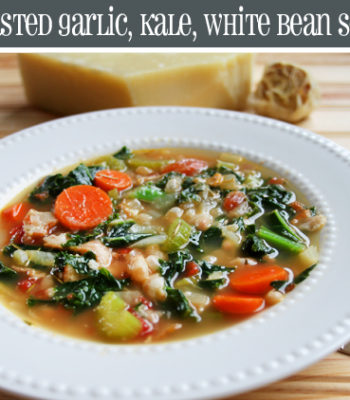
Roasted Garlic, Kale, and White Bean Soup

Shared June 7, 2016

Roasted-Garlic-Kale-White-Bean-Soup1

It’s no secret that I’m a big garlic fan, so I think this Roasted Garlic, Kale, and White Bean soup is pretty spectacular. The cast of characters doesn’t stop at just garlic – it has bacon, parmesan cheese, carrots, celery. . . did I mention bacon? Anyway, it’s a party where all the popular kids are. And it’s good.

Roasted Garlic, Kale, and White Bean Soup
 
Save Print
Author: Heather
Recipe type: Soup
Ingredients
  • 1 small head of garlic, roasted (roasting instructions below)
  • olive oil
  • 8-10 slices of thick-cut bacon, cooked and diced
  • 1 Cup yellow onion, diced finely
  • ¾ Cup carrot, diced
  • ¾ Cup celery, diced
  • 4 cloves of garlic, minced (yes, this is in addition to the roasted garlic)
  • 1 teaspoon dried rosemary
  • ¼ teaspoon crushed red pepper flakes
  • 6 Cups low-sodium chicken broth
  • 2 Cans (14 oz) of white beans (any variety), drained and rinsed
  • ¾ Cup Parmesan cheese, grated
  • 1 Can of diced tomatoes (14 oz)
  • 8-10 ounces of Kale, chopped roughly (Trader Joe’s sells this in a bag)
Instructions
  1. To roast garlic: Get your oven going at 375 degrees F. Slice the top end off the garlic. Drizzle olive oil over garlic. Season with salt and pepper. Put in small oven-safe dish, cover with aluminum foil. Roast for 35-40 minutes until it’s soft and golden brown. Set aside and let it cool. (Don’t skip this step. It is roasted garlic soup you’d be cutting the star of the show! If you are a zealous garlic lover – add 2 small heads of garlic to the soup. I dare you.)
  2. In a large soup pot (I used a dutch oven), drizzle a few Tablespoons of olive oil into pan. Over medium heat saute the onions, celery, carrots, minced garlic, rosemary and red pepper flakes. Season with salt and pepper to your liking (remember bacon and parmesan can be salty, so start with less and add more if you like). Cook for about 10 minutes until vegetables start to get soft and get to know each other.
  3. Add chicken broth, can of tomatoes, canned beans and your garlic puree from the oven (after roasted garlic has cooled, squeeze garlic out of “shell” into a bowl and mash with fork. That is your garlic puree).
  4. Add your cooked bacon (saving some for garnish) Bring to a light simmer for about 30 minutes.
  5. Stir in kale. Mix in parmesan cheese and stir well. It will cook way down. Simmer for about 10 minutes.
  6. Serve with a sprinkle of parmesan cheese and more bacon.
3.5.3208

Source: This recipe was adapted from a recipe I found from Cinnamon Spice and Everything Nice: White Bean, Bacon and Spinach Soup.

What’s your favorite soup to make (or eat, or both)? Let us know – we’d love to hear from you!

Comments

Filed Under: Recipes

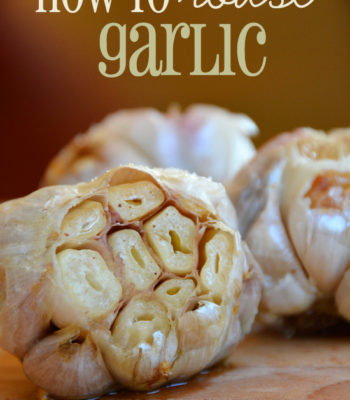
How to Roast Garlic

Shared June 7, 2016

How-to-Roast-Garlic

Roasted garlic is about one of the easiest “gourmet” things you can do to kick things up a notch. Whether you’re putting it in a roasted marinara sauce, adding it to homemade pizza or just spreading it onto a piece of bread. It’s incredibly easy.

How to Roast Garlic
 
Save Print
Author: Heather
Instructions
  1. Preheat oven to 375 degrees. Start with a fresh garlic bulb (or a few). Cut the top off of your garlic bulb. Just enough to expose the bulbs.
  2. Place garlic bulbs inside a piece of foil with cut side up.
  3. Drizzle with olive oil, salt and pepper.
  4. Close tin foil to keep heat contained. Make sure the foil seam is near the top so oil doesn’t leak out.
  5. Place in an oven safe container and bake at 375 degrees for about 30-45 minutes.
  6. You know it’s ready when it’s turned a light brown and looks caramelized. It should have a creamy consistency if you poke it with a knife. Let cool.
3.5.3208

If you are roasting multiple cloves at once, you could put EACH bulb of garlic in it’s own foil with it’s own seasonings and oil. Then using a cupcake pan, place each clove in a separate cupcake section (imagine a foil packet in it’s own spot in the cupcake pan). I might do this next time, I think they will roast more evenly.

If you want to keep your roasted garlic, I would recommend freezing it. Squeeze out of paper shell and you can freeze in single servings or in one large bag.

Is this how you roast garlic? Do you have tips for freezing roasted garlic? Do you have any other tips or tricks for keeping or storing it? 

Disclosure: I’m not responsible for the results that can occur from the over consumption of roasted garlic. It can affect everyone differently – but it is likely you will pay dearly for eating this delightful treat. You will likely stink. Your pores will probably sweat garlic. Your spouse, kids or co-workers may avoid you. That’s okay. Next time make sure to share with those around you – and you can all stink together.

Comments

Filed Under: Recipes

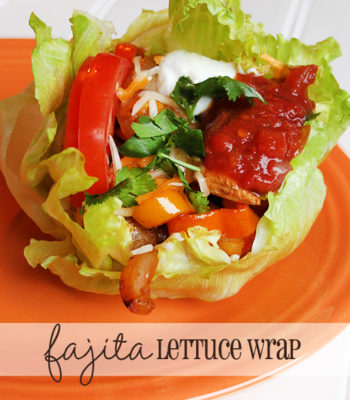
Chicken Fajita Lettuce Wrap

Shared June 7, 2016

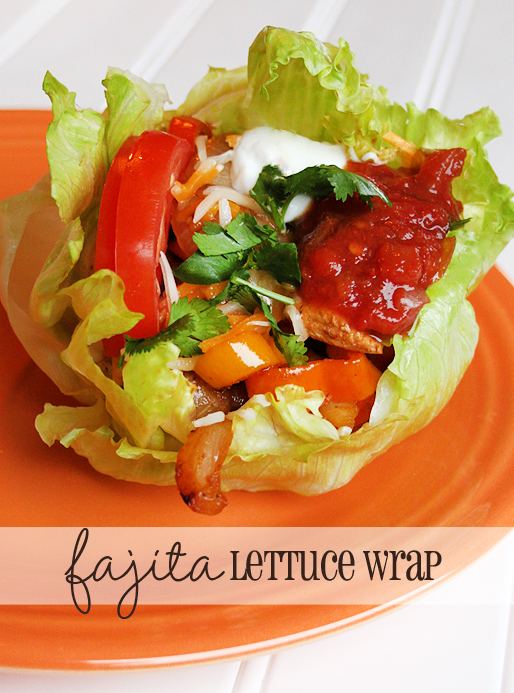
Fajita-Lettuce-Wrap-Recipe

We’re watching what we eat around here, so tonight we made chicken fajitas, but ditched the tortillas. We used two shells of iceberg lettuce, stacked inside of each other to serve as the “wrap” portion of the fajita. It was so good and both my husband and I were shocked at how well the lettuce held up to the juices and the weight of the stuffing – even better than some tortillas we’ve had in the past!

The star of the show were Sweet Mini Peppers I found at WinCo Foods. A two pound bag was just $3.98 and they are delicious! They are practically seedless, so super easy to wash up, dice and stir fry.

Chicken Fajita Lettuce Wrap
 
Save Print
Author: Heather
Recipe type: Chicken, Dinner
Ingredients
  • 1 small head of iceberg lettuce, fresh
  • Boneless, skinless Chicken breasts, about 2 pounds
  • 1 onion, peeled and sliced thinly
  • 7-8 Mini Sweet Peppers (or two regular sized), rinsed, seeded and sliced
  • 1.5 Tablespoon canola oil
  • Fajita seasoning mix – here is a basic homemade fajita seasoning recipe, I add more cumin and garlic powder in my version. WinCo Foods is also a great place to buy bulk seasonings! We usually pick up Taco seasoning and all our spices in bulk at our local WinCo.
  • Toppings, all optional and based on your likes: Sour cream, cheddar cheese, salsa, cilantro, black olives, tomatoes, whatever you like on tacos or fajitas. You could also make a batch of Spanish Rice in the Rice Cooker.
Instructions
  1. Add 1 Tablespoon canola oil to skillet on stove. Add chicken and saute on medium-high heat until fully cooked.
  2. Once chicken is fully cooked, set aside. Add ½ Tablespoon canola oil to the same skillet and toss in peppers and onions. Saute on medium until softened.
  3. Once peppers and onions are cooked, add chicken back into pan.
  4. Add fajita seasoning with ¼ cup of water – or basically just add water until the seasoning finely coats everything.
  5. Saute over medium heat until chicken has reheated and flavors have blended together.
  6. To make your lettuce wraps, I recommend using two leaves of lettuce. It’s crunchier and sturdier. Fill with your favorite toppings and enjoy right away.
3.5.3208

Have you ever made fajitas and wrapped them in lettuce? What are your favorite toppings for fajitas?

Comments

Filed Under: Recipes

Roasted Marinara Sauce

Shared June 7, 2016

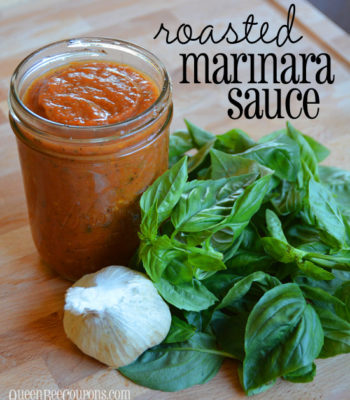
Roasted-Marinara-Sauce-Tomatoes-Basil-Garlic

Originally shared in 2013, this recipe is a FAVORITE and now is the perfect time of year to make up a batch! I hope you love it! 

This roasted marinara recipe could not be any easier and it beats jarred or canned sauce by a landslide. I admittedly tried to make a homemade marinara sauce in the crockpot last fall and it was a MAJOR fail. I don’t know why, but it just tasted bitter and blah.  But this, this is how you make marinara sauce – roasted.

The measurements in this recipe are just a suggestion. It’s what I ended up putting into my marinara sauce, but add more of what you like and less of what you don’t. I’m fairly certain you can’t mess this up.

Roasted Marinara Sauce
 
Save Print
Author: Heather
Ingredients
  • Tomatoes – About 5 pounds - I used a combination of roma, cherry, and glacier – some from my garden, some store bought. Dice large ones and leave cherry tomatoes whole. Remove stems.
  • Fresh Basil – Cup (packed) with fresh basil leaves, washed (whole leaves), stems removed
  • Fresh Garlic – Whole cloves, about 10 or ¼ Cup -I like garlic, use less if this sounds like too much
  • Zucchini – 1 – 2 zucchinis, diced in ½″ thick slices
  • Onions – Two medium onions, quartered - I used a red onion and a Walla Walla Sweet onion (from my garden)
  • Olive oil – About 2 Tablespoons
  • Balsamic Vinegar – 1 Tablespoon (optional)
  • Salt – ¾ Tablespoon
  • Italian Seasoning – 1 Tablespoon
  • Ground Pepper – To taste
Instructions
  1. Preheat oven to 400 degree F.
  2. Wash and chop all your vegetables. If you have large tomatoes, quarter them. Basically you want everything about the same size when you chop it up – so it all cooks at the same rate.
  3. Once all your vegetables are chopped, toss them into a roasting pan or glass pyrex pan. Drizzle olive oil and balsamic vinegar over vegetables. Add salt, italian seasoning and ground pepper to taste.
  4. Pop in the oven. Cook 45-60 minutes at 400 degrees. You can take the pan out about half way through and give it a good stir. If you have enough for multiple pans, rotate them on the shelves so they cook evenly.
  5. Remove from oven. Allow to cool.
  6. Once cool to touch, use a slotted spoon to scoop vegetables into a food processor, blender or Blendtec/Vitamix. I recommend a slotted spoon because I found I had a lot of liquid from my tomatoes – leave the juice in the pan, you can add more later.
  7. Puree your vegetables. The longer you puree, the smoother the sauce. If you had very seedy tomatoes, puree a bit longer to help break those up. Scoop in liquid from your roasting pan to get it to the consistency you would like. You can always freeze this liquid for tomato soups or to add to sauce at a later time (I didn’t want to throw mine away!). If it’s not thick enough for you, try adding some tomato paste.
  8. Freeze in Ziploc bags or freezer bags. Or if you’re up for it, can it!
3.5.3208

I knew the recipe was a keeper when my daughter sat down, right there on the kitchen floor and ate a bowl of it, without noodles, without cheese. She loved it! So it’s kid-approved, in case you’re wondering.

I’d love to hear what you think about this recipe! I’m excited to get more tomatoes and try some different variations. I might try to add the basil in fresh to the food processor – I bet that would give it a vibrant color and possibly a stronger flavor.

Comments

Filed Under: Recipes

Slow Cooker Black Beans (No Soak Method)

Shared June 7, 2016

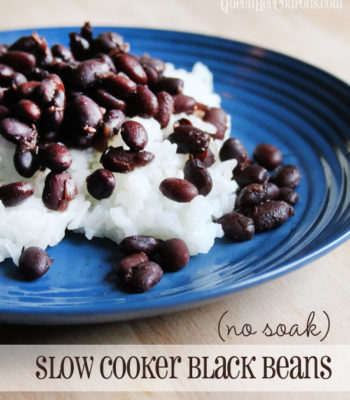
no-soak-slow-cooker-black-beans

Crockpot black beans, with no soaking required, can easily be made in an afternoon for a fraction of the price you’d pay for canned blacked beans. Plus I think they taste a million times better.

Slow Cooker Black Beans (No Soak Method)
 
Save Print
Author: Heather
Recipe type: Slow cooker
Ingredients
  • 1 pound dried black beans (do not pre-soak), this is about 2.5 Cups when I measured mine
  • ½ – 1 large onion, peeled and chopped
  • 2 Cups chicken broth
  • 4 Cups water
  • 1-2 cloves fresh garlic, minced
  • ½ Teaspoon Cumin (leave this out if you want them to be more plain)
  • 1 Bay leaf
  • 1 Teaspoon Salt (do not add until last hour of cooking)
Instructions
  1. Pour your black beans out onto a table and look for rocks and other debris. You’d be surprised how many you might find.
  2. Toss black beans into a colander and rinse thoroughly.
  3. Throw all the ingredients, except for the salt, into the slow cooker. Put it on high for six hours or low for 8-10 hours.
  4. You will know it’s done when beans are splitting apart and are tender. Add salt the last hour of cooking. Remove bay leaf and serve.
3.5.3208

We served our black beans with rice. You can keep these in the fridge for 3-5 days adding them to salads, burritos, tacos or whatever might be on your menu. Or place in freezer bags and freeze flat for later use. Have you tried making black beans in the slow cooker before?

You might also want to try my slow cooker refried bean recipe! 

(This recipe was adapted from one at Cafe Johnsonia)

Comments

Filed Under: Recipes, Slow Cooker

  • « Previous Page
  • 1
  • …
  • 11
  • 12
  • 13
  • 14
  • 15
  • …
  • 17
  • Next Page »
Happy-Hive-About

Recent Posts

  • How to Clean Stained Cutting Board {Naturally}
  • Homemade play dough using Kool-Aid or Jell-O (preschool teacher and kid approved!)
  • Homemade Hummingbird Food (Nectar)
  • Peanut Butter and Jelly Gelato {Kid-friendly recipe}
  • Spring Cupcake Designs – 6 Easy Spring and Easter Cupcake Designs

Recent Comments

  • Jana Miller on Cottonwood, Jerome, Sedona, Prescott, more {Arizona}
  • Sue Eichler on Cottonwood, Jerome, Sedona, Prescott, more {Arizona}
  • Paris Jeske on Earning a living on the road – How we (and others) are making money while we travel full-time
  • Paris Jeske on Earning a living on the road – How we (and others) are making money while we travel full-time
  • Karen on Healthcare benefits on the road – We break an arm and end up in emergency room!

Recent Posts

  • How to Clean Stained Cutting Board {Naturally}
  • Homemade play dough using Kool-Aid or Jell-O (preschool teacher and kid approved!)
  • Homemade Hummingbird Food (Nectar)
  • Peanut Butter and Jelly Gelato {Kid-friendly recipe}
  • Spring Cupcake Designs – 6 Easy Spring and Easter Cupcake Designs
This error message is only visible to WordPress admins

Error: No feed found.

Please go to the Instagram Feed settings page to create a feed.

Copyright ©2026, A Happy Hive. All Rights Reserved. Custom design by Pixel Me Designs