A Happy Hive

The best in savings, home, food and travel

  • Savings
  • Home
  • Food
  • Travel
  • Savings
    • Grocery
    • Print Coupons
  • Your Home
    • Chicken Coops
    • Gardening
  • Food
  • Travel
  • Earn Money
  • Rise & Shine
  • About
  • Contact Us

How to Dehydrate Strawberries

Shared June 7, 2016

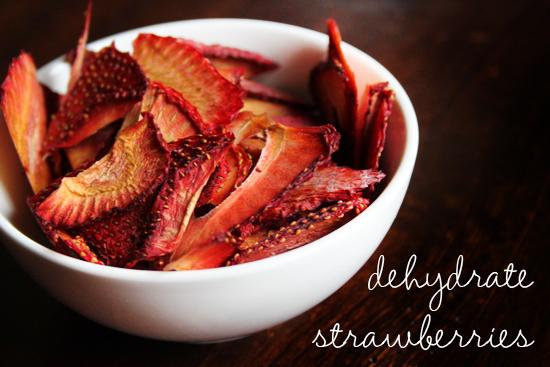
dehydrate-strawberries

In addition to dehydrating mangoes, I also dehydrated strawberries last week, and they were so delicious and easy.

How to Dehydrate Strawberries
 
Save Print
Author: Heather
Recipe type: Fruit
Instructions
  1. The first thing you’ll want to do is wash and dry your strawberries.
  2. Then you hull them – basically chop off the green top (feed that to your chickens!).
  3. Slice strawberries into ¼ thick slices.
  4. And lay them out on your dehydrator tray.
  5. Dry at 130 degrees F for 8 to 16 hours. You’ll know they are done when they feel dry, leathery and no longer juicy. But they are still pliable.
3.5.3208

And interesting fact I read in The Dehydrator Bible: Includes over 400 Recipes – that locally grown, fresh-picked strawberries will actually dry out faster than varieties that are grown for a longer shelf life! I had no idea, but I’ll have to remember that when I pick up flats of berries from my local berry farm this summer!

My only complaint so far is they get eaten so quickly. I’d love to put them in a jar and admire them all afternoon, but my kids (and husband) devour them within a day. At least they’re getting healthy foods and it sure is fun to see them enjoy it so much.

I’m not an expert at this by any means. I referenced these two books especially, which I’m guessing you can find at your local library (or Amazon):

  • The Dehydrator Bible: Includes over 400 Recipes
  • The Complete Guide to Drying Foods at Home: Everything You Need to Know about Preparing, Storing, and Consuming Dried Foods (Back to Basics)

As for the type of dehydrator that you need – I think all of them are pretty great. First you can check your local thrift shops, because they are big appliances I think people get tired of storing them and donate them a lot.

Amazon has this Nesco FD-80A Square-Shaped Dehydrator Amazon Frustration-Free Packaging on sale for $55. This is the best price it’s ever been on Amazon. Regular price is $98 and it has nearly 5 out of 5 star reviews.

I personally have the Excalibur 3900B 9 Tray Deluxe Dehydrator, Black – but it’s certainly a dehydrator on steroids – probably much more than the average person needs. The only reason I splurged is because I found a crazy good deal that included a lightning deal and a gift card I had. But I have to say that I do love it and I’m super impressed.

I’d love to hear from you – what do you dehydrate? How do you use your dehydrator? Have you dehydrated strawberries before?

Comments

Filed Under: Recipes

Grilled Strawberries with Balsamic Vinegar

Shared June 7, 2016

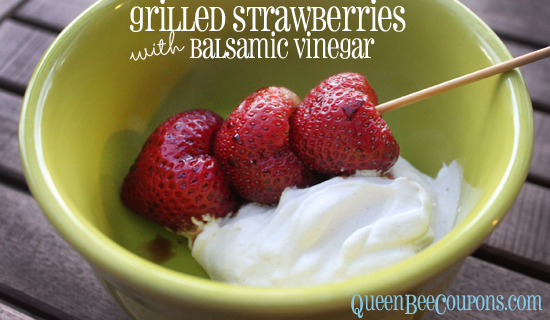
grilled-strawberries-with-balsamic-vinegar-recipe

With strawberries coming into season here in the Northwest this is an inexpensive, easy-to-make, relatively healthy dessert – Grilled strawberries with balsamic vinegar. Served with homemade whip cream – it’s divine!

Grilled Strawberries with Balsamic Vinegar
 
Save Print
Author: Heather
Recipe type: Dessert
Ingredients
  • 8 whole strawberries, hulled and left whole
  • 1 tablespoon balsamic vinegar
  • 1 tablespoon sugar (you could use Splenda or brown sugar if you like)
  • Wood skewers – you can soak in water if you want, but they aren’t on the grill very long
  • Optional garnishes – toasted almonds, mint, basil, chocolate chips
Instructions
  1. Preheat grill to high.
  2. In a bowl, coat strawberries with balsamic vinegar and sugar.
  3. Skewer strawberries down the middle.
  4. Grill on high for one to two minutes, until warm. Don’t grill too long, they’ll get mushy.
  5. Serve with homemade whip cream and garnishes of your choice.
3.5.3208

Recipe adapted from Grilled Strawberries Ala Mode recipe 

What is your favorite fruit to grill? 

Comments

Filed Under: Recipes

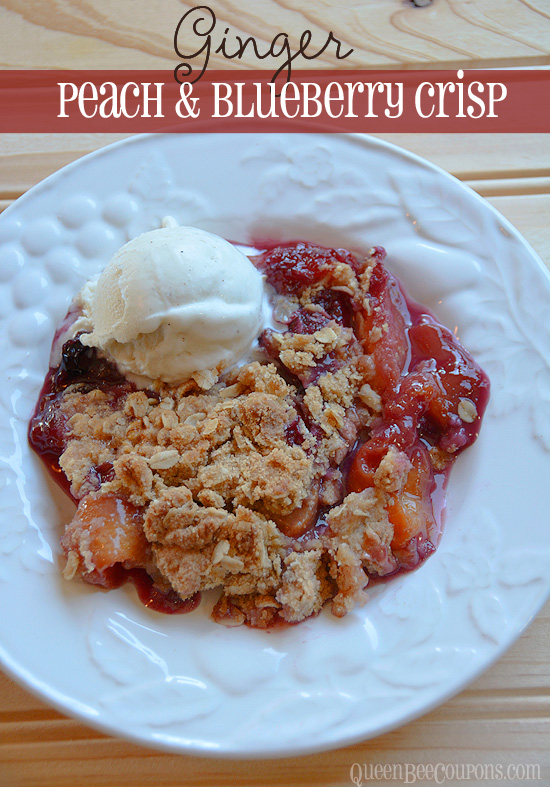
Ginger Peach and Blueberry Crisp

Shared June 7, 2016

Ginger-Peach-Blueberry-Crisp-Recipe

I’ve been talking all week about peaches. Besides peeling the peaches, freezing them for smoothies and make ahead pie filling, I made this delightful Gingered peach and blueberry crisp. This crisp recipe is incredibly easy and it’s a delicious way to combine peaches and blueberries, both ripe about the same time!

Ginger Peach and Blueberry Crisp
 
Save Print
Author: Heather
Recipe type: Dessert
Ingredients
  • 6 cups of sliced, peeled peaches (Peel them easily using this method here.)
  • 2 cups blueberries, washed and dried
  • 2 Tablespoons crystallized (or candied) ginger, diced very small - usually found in your produce section, usually comes in a small bag, hanging on a hook. Often comes in slices, you’ll need to finely chop. WinCo carries it in bulk bin 1700 – yay!
  • Juice from one large fresh lemon
  • 1 Tablespoon vanilla extract
  • 1 Tablespoon cornstarch
  • ½ teaspoon Salt
  • A small pinch of cinnamon
Crisp topping
  • 1 Cup flour (I used whole wheat)
  • ½ Cup light brown sugar
  • ½ teaspoon salt
  • 1 Cup Quick Cooking Oats
  • 12 Tablespoons cold butter, diced
Instructions
  1. Preheat oven to 375 degrees
  2. In a large bowl mix together the cornstarch, salt, cinnamon, vanilla extract and juice from lemon.
  3. Fold in peaches, blueberries and ginger. Be gentle, you don’t want to mash your fruit, just evenly coat it.
  4. In another bowl mix up your crisp topping. Cut the cold butter into the mix using a pastry mixer or use your hands.
  5. In a 9 x 13 baking dish (or I used a stoneware casserole dish), spread out your fruit mixture. You want a large pan – the fruit mixture will bubble up about ½ inch – so make sure the sides go up above the mixture and crisp topping.
  6. Top with your crisp topping. Get it spread out as evenly as possible.
  7. Bake for 45 to 50 minutes. Until the crisp topping is lightly browned and the mixture is bubbling up the side.
  8. Serve with a scoop of your favorite vanilla bean ice cream.
3.5.3208

What kind of fruits do you like to use in your desserts?

Comments

Filed Under: Recipes

Eggplant Parmesan

Shared June 7, 2016

Eggplant-Parmesan-Recipe

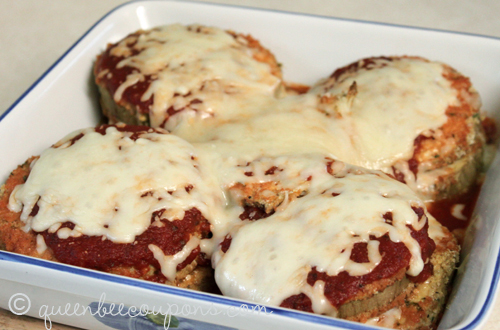
One of the ways we save on our meals is we don’t have meat at every meal. My meat-lovin’ mother gasps at the idea – how can you live without meat at every meal? But we seem to be surviving. ?One of my favorite vegetarian recipes is Eggplant Parmesan – anything coated in bread crumbs and smothered with cheese is good right? Especially as the weather starts to get a little chillier and you’re craving those comfort foods!

This recipe is adapted from the Weight Watcher’s recipe – so I think it’s a healthier version of your typical eggplant parmesan recipe. Most eggplant parmesan recipes have you pan fry the eggplant before it’s baked – but this recipe bakes them. Disclaimer: This particular time we made it – my hubby added extra cheese, so the version pictured above is not quite as healthy as the recipe listed below – but you’ll be surprised how a little cheese can go a long way with this recipe.

Eggplant Parmesan
 
Save Print
Author: Heather
Recipe type: Dinner
Ingredients
  • 1 spray(s) cooking spray (I don’t personally like cooking sprays, so I use an olive oil spritzer or just wipe the pan with a paper towel dabbed in olive oil)
  • ⅓ cup(s) seasoned bread crumbs, Italian-style
  • 1 Tbsp grated Parmesan cheese
  • 1 tsp italian seasoning
  • ¼ tsp garlic powder
  • 1 medium raw eggplant
  • 2 large egg white(s), lightly beaten
  • 1½ cup(s) canned tomato sauce (or spaghetti sauce)
  • ½ cup(s) (shredded) part-skim mozzarella cheese, shredded
  • Optional: Pasta – We like to enjoy our eggplant parmesan on a bed of pasta.
  • Optional: Mushrooms – I like adding mushrooms to the mix sometimes. I’d recommend slicing them and giving them a quick saute in olive oil in another pan. Add them to the layers you’ll be doing before baking.
  • Optional: If you have fresh basil – add it to the mix! It’s divine.
  • Optional: Fresh garlic – minced and added to your tomato sauce
Instructions
  1. Preheat oven to 350°F. Coat a 9 X 13-inch baking dish with cooking spray (I use an olive oil spritzer); set aside.
  2. If you plan to serve your eggplant parmesan over some pasta – get your water boiling and start your pasta.
  3. Combine bread crumbs, Parmesan cheese, Italian seasoning and garlic powder in a medium-size bowl; set aside.
  4. Remove skin from eggplant and trim off ends; slice eggplant into ½-inch-thick slices.
  5. Dip eggplant first into egg whites and then into bread crumb mixture. Place on cookie sheet.
  6. Bake eggplant on a nonstick cookie sheet until lightly browned, about 20 to 25 minutes, flipping once.
  7. Once they are baked, place a layer of eggplant on the bottom of prepared baking dish, then add ⅓ of tomato sauce and ⅓ of mozzarella cheese. Repeat with two (2) more layers in same order. (Our eggplants are usually too stubby to do this many layers, so we just do two).
  8. Bake until cheese is melted and sauce is bubbling, about 10 minutes more. Serve on pasta if you like!
3.5.3208

I’d love to hear what you think! What are your favorite eggplant recipes?

Recipe credit: Weight Watchers

Comments

Filed Under: Recipes

Southwest Quinoa Salad

Shared June 7, 2016

Southwest-Quinoa-Salad

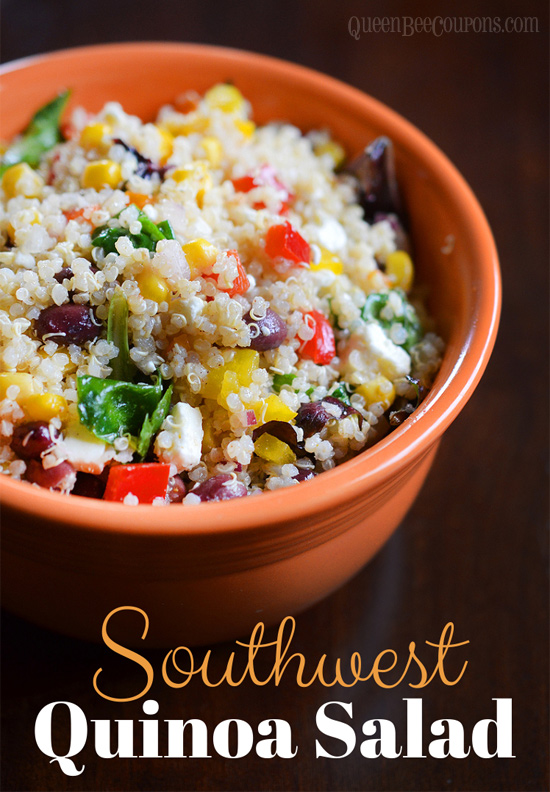
This is Quinoa Southwest Salad is probably my favorite, favorite quinoa salad. I could eat the whole bowl. I really could. The southwestern dressing and a bowl full of good stuff – I hope you like it too.

Southwest Quinoa Salad
 
Save Print
Author: Heather
Recipe type: Salad
Ingredients
  • Quinoa, 1 cup (See how to cook quinoa in your rice cooker)
  • Feta, 1 Cup
  • Black beans, 1 can (15 oz)
  • Red or yellow pepper, diced small
  • Corn, 1 can (15 oz)
  • Spinach or some kind of greens (I like to use an arugula/green mix)
  • Red onion, diced very, very small
Dressing
  • Fresh lime juice, ½ cup (I used two limes)
  • Red wine vinegar, 3 Tablespoons
  • Olive Oil ¼ Cup
  • Cayenne powder, ¼ teaspoon
  • This has a slight bite, if you want less, use less)
  • Cumin, 1 Tablespoon
  • Salt, ½ teaspoon
  • Pepper, a few dashes
Instructions
  1. Cook quinoa. I like to cook my quinoa in a rice cooker. Don’t have a rice cooker? Cook on the stove top by bring 1¼ cup water or chicken broth to a boil (basically the ratio is 1 part quinoa to 1.25 part liquid). Add 1 Cup rinsed quinoa, give it a good stir, reduce heat to low and let it simmer for about 30-35 minutes.
  2. While your quinoa is simmering, make up your dressing by whisking together all dressing ingredients. In a separate bowl add black beans (rinsed, drained), corn (rinsed, drained), diced pepper, spinach and red onion.
  3. Allow quinoa to cool completely. Once cooled and right before serving, add all ingredients together in a large bowl and stir. If you want to make it ahead of time – I’d just add the lettuce and feta at the time of serving.
3.5.3208

What is your favorite quinoa recipe? 

Comments

Filed Under: Recipes

Homemade Corn Dogs

Shared June 7, 2016

Corn-dog-recipe-homemade-batter

We made Homemade Corn Dogs last night! This is yet another food item that is loved by children and hit-or-miss with the adult folk.

Let me just say – these were easier than I thought they would be. You mix up a batter, stick the hot dogs in batter, drop hot dogs in a vat of boiling oil. And you’re done! It was admittedly my first time “frying” on the stove top and I survived.

Homemade Corn Dogs
 
Save Print
Author: Heather
Ingredients
  • ½ Cups cornmeal (a finer grind. I used a medium-grind and wish it had been finer). Amazon has had some fantastic deals on Bob’s Red Mill Gluten Free Cornmeal, 24-Ounce Packages (Pack of 4) – dropping as low as $6.44 for four bags!
  • 1 Cup all-purpose flour - about ½ cup extra for coating hot dogs before dipping in batter
  • 1 Tablespoon baking powder
  • 2 teaspoons sugar
  • 1½ teaspoons salt
  • 1 teaspoon baking soda
  • 1¾ Cups milk (or buttermilk)
  • 4 large eggs, beaten
  • 3 quarts vegetable oil (or other frying oil)
  • 8 hot dogs
Instructions
  1. Pour your oil into a large dutch oven, at least 6-quarts, on medium-high heat. You want it to be about 350 degrees when you start frying the corn dogs. I used a candy thermometer to track temp (I have no idea if this is a good idea or not, I’ve never fried anything on stove before). You’ll want a wire rack nearby to put them on after they are done cooking.
  2. Mix together the cornmeal, flour, baking powder, salt and baking soda in a large bowl
  3. In another bowl, mix together milk and eggs
  4. Mix both cornmeal mixture and milk/eggs together in a large bowl. Preferably a bowl with a pour spout indent – as you’ll be pouring batter into a tall drinking glass for dipping the dogs.
  5. Insert wooden skewers through hot dogs. Make sure the stick + hot dog length is not too long to fit in your dutch oven – because when you drop them in to the oil you don’t want part of it sticking out.
  6. Take a large plate and sprinkle ½ Cup of flour on top of plate. Roll hot dogs in flour. This light dusting of flour helps the batter stick to them.
  7. Whisk batter again and pour into a tall drinking glass. Tall enough to cover hot dogs. Dip hot dogs into batter. Let extra batter drip off.
  8. Drop hot dogs into oil. Cook for about five minutes – until golden brown. Use metal tongs to turn corn dog in oil.
  9. Remove corn dog from oil and place on a wire rack so excess oil can drip off. Be careful! The wooden skewer will be hot, too!
  10. Serve immediately with ketchup, mustard or whatever you like.
3.5.3208

This recipe is modified from one found in The America’s Test Kitchen Quick Family Cookbook: A Faster, Smarter Way to Cook Everything from America’s Most Trusted Test Kitchen. A great bargain at $13.98, it has some great tips and recipes in it! 
Have you made homemade corn dogs before?

Comments

Filed Under: Recipes

How to Freeze Peaches

Shared June 7, 2016

Freeze-Peaches

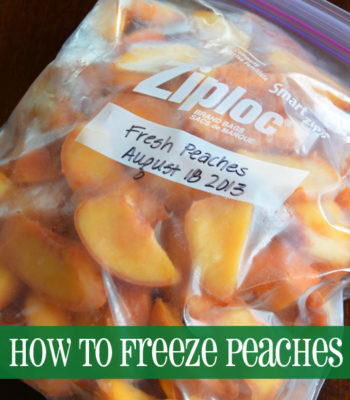
I like to freeze fruit. It’s so easy and if you freeze it while it’s in season you can put it up for those winter months when you’re craving some fruit but the stores expect you pay an arm and a leg for it. Freezing peaches is really easy.

How to Freeze Peaches
 
Save Print
Author: Heather
Recipe type: Fruit
Instructions
  1. First, peel the peaches using this nifty boil technique.
  2. After you’ve peeled your peaches, slice them up. You can dice or slice – whatever you like. Be careful, they are slippery when they have been peeled.
  3. Put all your sliced peaches in a big bowl and add lemon juice. I had about 10 Cups of peaches and added the juice of one large lemon. This is going to help them from turning brown (oxidizing) when they are exposed to air. If you don’t care about color – skip this step.
  4. Line cookie sheets with wax paper and spread out the peach slices. We are doing this because we want them to freeze separately. If you throw them all in the freezer in a bag, you will have a HUGE glob of peaches that will be hard to work with.
  5. Pop the cookie sheets into the freezer and leave them in there until the peach slices are completely frozen. Probably about 6-8 hours? I let mine freeze over night.
  6. Pop them off the wax paper and put them into a freezer Ziploc bag.
3.5.3208

There you have it! These should keep for at least a few months in the freezer. You can pull out a handful of peaches for smoothies, desserts or  even eat them frozen!

And here’s another idea – make ahead pie filling! Freeze in pie tins, once frozen, remove and store in freezer bag until you’re ready to make a pie!

Do you freeze fruit? 

Comments

Filed Under: Recipes

Make Ahead Peach Pie Filling

Shared June 7, 2016

make-ahead-pie-filling-freeze

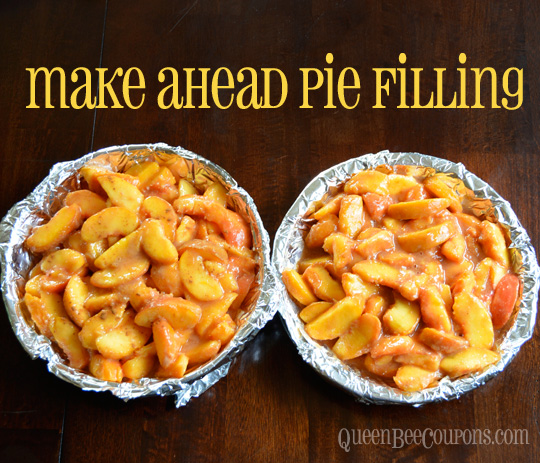
I LOVE this tip that I got from Jennifer after I asked for ideas on what I should do with 25 pounds of peaches! She not only gave me a great peach pie filling recipe, but recommended freezing in pie plates so it could easily be popped into a pie plate and baked when needed!

Make Ahead Peach Pie Filling
 
Save Print
Author: Heather
Recipe type: Dessert
Ingredients
  • 6 Cups thinly sliced, peeled fresh peaches (Read my tutorial on how to quickly and easily peel peaches)
  • ½ – ¾ Cup Sugar
  • 3 Tablespoons flour
  • ½ Teaspoon Ground Cinnamon
  • Dash of Ground Nutmeg
  • 2 tsp lemon juice
Instructions
  1. In a big bowl, mix together your sugar, flour, cinnamon and nutmeg. Add peaches and lemon juice. Toss peaches until coated.
  2. Line a 9″ pie plate with foil. Spoon pie filling into pie plate. Cover and freeze until firm. I put mine in overnight.
  3. Pull foil off of filling and place inside a gallon Ziploc bag. Place it back in the freezer until it’s pie time.
  4. To serve, pop frozen filling into the same pie plate with a crust (pre-made or homemade) Dot with 2 tbsp butter, diced.
  5. Top with pie crust, with slits, for steam to escape. Cover edge with foil to avoid over browning and bake at 375 for 45 minutes.
  6. Remove foil from edge and back 30 minutes more until crust is golden brown and juice begins to bubble. Cool on wire rack.
  7. Enjoy your pie!
3.5.3208

(source: Midwest Living)

Like Jennifer, I’m not a fan of pie crust, so we’ll probably use this to make a crisp. You can skip the pie crust all together and use this is Jennifer’s crisp topping recipe:

Peach Crisp Topping
 
Save Print
Author: Heather
Recipe type: Dessert
Ingredients
  • ½ Cup Quick Cook Oats
  • ½ Cup Brown Sugar
  • 12 Tablespoons butter , diced
  • ¼ Cup Flour
  • ½ tsp Cinnamon
  • Dash of salt
Instructions
  1. Place filling into pie plate. Top with crisp topping mixture. Bake at 375 degrees for 50 minutes or until filling tests done with a fork!
3.5.3208

What a time saving tip and a great way to have fresh peach pie in the middle of winter! 

Have you done this before?  What’s your favorite make ahead pie filling recipe?


Comments

Filed Under: Recipes

How to Peel Peaches

Shared June 7, 2016

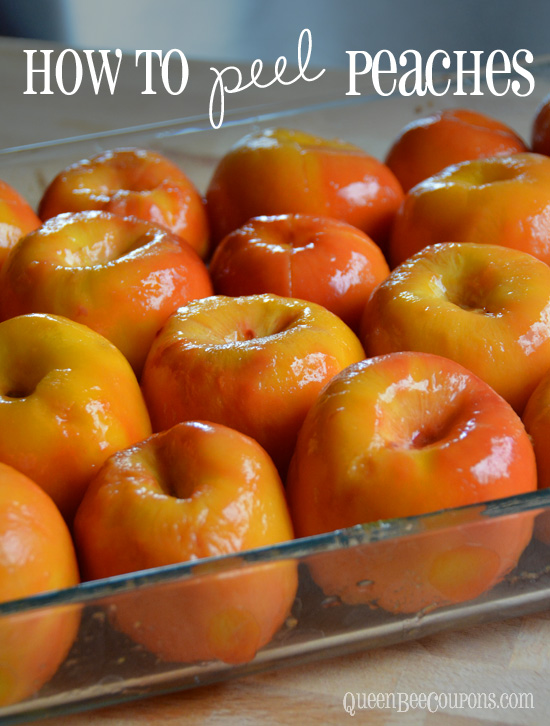
How-to-peel-peaches-whole

What to do when you have a box of 25 pounds of peaches? The possibilities are endless (baking, canning, freezing) – but most start with peeling the peaches. And although I had heard that peeling peaches was an easy process, I’d never done it before – so I kept putting it off. I finally got around to it this weekend and let me just say, I was silly to procrastinate. Peeling peaches with this method was insanely easy!

Your peaches should be ripe – but not mushy before you start this process.

How to Peel Peaches
 
Save Print
Author: Heather
Recipe type: Fruit
Instructions
  1. Using a paring knife, score a big X into the bottom of each peach. Not too deep, just enough to cut the skin.
  2. Get a big sauce pan of water boiling on the stove.
  3. Drop 3-4 peaches into the boiling water, let sit for about 30 seconds
  4. Use a slotted spoon and transfer peaches from boiling water to ice bath (large bowl of water with lots of ice).
  5. Remove peaches from ice water and the skin should peel back with ease!
3.5.3208

Wasn’t that easy? I set up a little assembly line and seriously got 25 pounds of peaches peeled in less than 30 minutes.

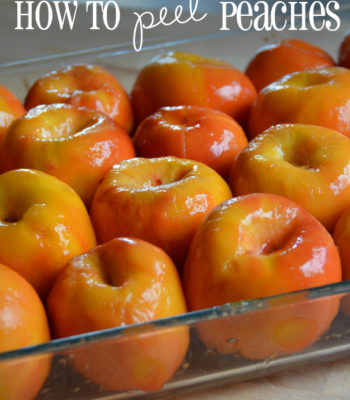
They are so pretty when they are all peeled and ready to go. . .now what should we make with them? I have some ideas that I’ll be sharing throughout the week. . . .

Have you used this method to peel peaches before? What’s your favorite thing to make with peaches?

Comments

Filed Under: Recipes

Homemade Pumpkin Puree

Shared May 31, 2016

Homemade-Pumpkin-Puree-How-To-Recipe

Sugar pumpkins are so plentiful (and affordable) during the fall and they make the BEST pumpkin puree!

Canned pumpkin can be spendy – usually $1.50 – $2 on sale for a 15 oz can. But making it homemade is so much more afforable! I was able to get 3.5 cups (or 28 oz) of fresh pumpkin puree from my smallish sugar pumpkin. So nearly twice the pumpkin puree  for the same price.

Is it worth the extra hassle? That’s up to you. I did like the “roasted” flavor and also knowing that it’s fresh and free of extra preservatives.

Homemade Pumpkin Puree
 
Save Print
Author: Heather
Ingredients
  • 1 sugar pumpkin
Instructions
  1. Cut the stem off the top of the pumpkin. Be very careful and use a sharp knife – it can be tricky to cut into the tough skin.
  2. Cut the whole pumpkin down the middle – right in half.
  3. Scoop out all the seeds inside.
  4. Cover a baking sheet with tin foil and lay pumpkin halves facedown on pan. Cover with another layer of tin foil. Bake, covered, in the oven at 350 degrees for 1.5 hours.
  5. Remove from oven and allow to cool.
  6. Once cool to touch, peel the skin off the top. I found it easier to find the little air pockets under the skin and start from that area. It was incredibly easy to peel the skin off.
  7. Toss into food processor and puree until smooth.
  8. Spoon into zipped baggies and flatten for the freezer! I bagged mine in 1 cup amounts, so they’d be easy to measure for recipes. I used quart bags and they worked just fine, but if you want less mess, go with the gallon size bag – it’s easier to fill if it’s big enough for the spoon.
3.5.3208

I hear you can also roast the entire pumpkin in the oven – that you don’t even have to bother cutting the top off, cutting it in half and scooping out the seeds until AFTER it’s roasted. I will give that a try next time, but I was worried about having seeds and goop mixed in with the soft, cooked pumpkin.

The whole process took me about two hours – 10 minute prep to start, 1.5 hours in oven and 20 minutes to peel, puree and pop in the freezer. I’m not sure I’ll do this every time I need pumpkin puree but I think it’s certainly a good option and it will save you about 50% off.

Here’s the perfect recipe for your pumpkin puree – it’s Slow Cooker Turkey Pumpkin Chili and it’s delicious!

So tell me – have you done this before? What should I make with my pumpkin puree?

Comments

Filed Under: Recipes

  • « Previous Page
  • 1
  • …
  • 12
  • 13
  • 14
  • 15
  • 16
  • 17
  • Next Page »
Happy-Hive-About

Recent Posts

  • How to Clean Stained Cutting Board {Naturally}
  • Homemade play dough using Kool-Aid or Jell-O (preschool teacher and kid approved!)
  • Homemade Hummingbird Food (Nectar)
  • Peanut Butter and Jelly Gelato {Kid-friendly recipe}
  • Spring Cupcake Designs – 6 Easy Spring and Easter Cupcake Designs

Recent Comments

  • Jana Miller on Cottonwood, Jerome, Sedona, Prescott, more {Arizona}
  • Sue Eichler on Cottonwood, Jerome, Sedona, Prescott, more {Arizona}
  • Paris Jeske on Earning a living on the road – How we (and others) are making money while we travel full-time
  • Paris Jeske on Earning a living on the road – How we (and others) are making money while we travel full-time
  • Karen on Healthcare benefits on the road – We break an arm and end up in emergency room!

Recent Posts

  • How to Clean Stained Cutting Board {Naturally}
  • Homemade play dough using Kool-Aid or Jell-O (preschool teacher and kid approved!)
  • Homemade Hummingbird Food (Nectar)
  • Peanut Butter and Jelly Gelato {Kid-friendly recipe}
  • Spring Cupcake Designs – 6 Easy Spring and Easter Cupcake Designs
This error message is only visible to WordPress admins

Error: No feed found.

Please go to the Instagram Feed settings page to create a feed.

Copyright ©2026, A Happy Hive. All Rights Reserved. Custom design by Pixel Me Designs