A Happy Hive

The best in savings, home, food and travel

  • Savings
  • Home
  • Food
  • Travel
  • Savings
    • Grocery
    • Print Coupons
  • Your Home
    • Chicken Coops
    • Gardening
  • Food
  • Travel
  • Earn Money
  • Rise & Shine
  • About
  • Contact Us

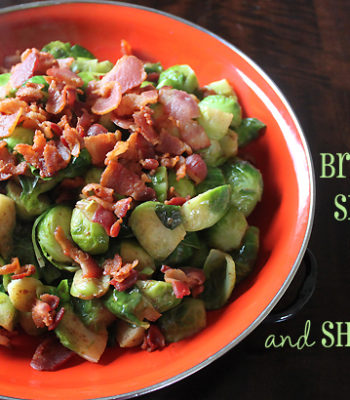
Brussels Sprouts with Bacon and Shallots

Shared June 11, 2016

Brussel-Sprouts-Bacon1

We had a bag of Brussels sprouts in the fridge just waiting for us to show them some love. And what better love to show then to sprinkle them with bacon? We introduced the Brussels sprouts to the bacon, with a little shallot – and it was a party that we’ll be throwing together again. Even my son ate these Brussels sprouts!

I can’t decide if this is a side dish or a main dish – I think it would work either way. What do you think?

Brussels Sprouts with Bacon and Shallots
 
Save Print
Author: Heather
Recipe type: Vegetables
Ingredients
  • 3 slices bacon, chopped - If you can, look for a center-cut bacon. Since it’s a primary ingredient in the recipe you want it to be a good quality bacon.
  • 1 tablespoon extra-virgin olive oil
  • 1 shallot, chopped
  • 1½ pounds brussels sprouts, trimmed, small spouts left whole, larger spouts halved
  • 1 cup chicken broth
  • Salt and pepper, to your taste - Although I think we’d leave the salt out next time – the bacon and chicken broth seems to provide plenty.
Instructions
  1. Brown bacon in a medium skillet over medium high heat.
  2. Remove bacon and place on a paper towel on a plate.
  3. Add extra-virgin olive oil to the pan. We opted not to use the full tablespoon. We drained off some bacon grease and found like we had plenty of “flavor” to saute the brussels sprouts
  4. Add shallots to the pan and saute 1 to 2 minutes.
  5. Add brussels spouts and coat in oil. Season with salt and pepper, if you want.
  6. Cook brussels sprouts 2 to 3 minutes to begin to soften, then add broth.
  7. Bring broth to a bubble, cover and reduce heat to medium low.
  8. Cook 10 minutes, until tender. Transfer sprouts to a serving dish with a slotted spoon and top with cooked bacon bits.
3.5.3208

Recipe credit: Rachael Ray, Food Network

What is your favorite way to make Brussels sprouts?
Comments

Filed Under: Recipes

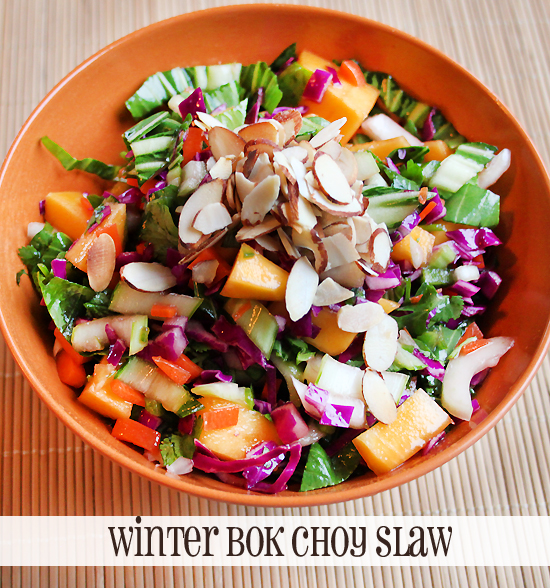
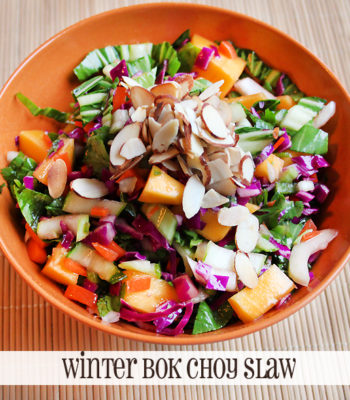
Winter Bok Choy Slaw

Shared June 11, 2016

Winter-Bok-Choy-Slaw

If you like your salads to be pretty, this Winter Bok Choy Slaw could definitely win the title of America’s Next Top Model, Salad Edition. I think it would be a great side (or topping) for some fish tacos or some grilled fish.

My husband, who is not a fan of “slaw” thought this was one of his favorite salads. I think it tastes better overnight in the fridge as the flavors seem to marry and the peppers mellowed.

Winter Bok Choy Slaw
 
Save Print
Author: Heather
Recipe type: Salad
Ingredients
  • 3 Cups thinly sliced baby bok choy - Make sure it’s baby bok choy – because it will have more tender leaves.
  • 1 Cup grated carrot
  • 1 Cup thinly sliced purple cabbage
  • 1 ripe mango, peeled, pitted and diced - I think next time I’ll add two mangos. I liked this part of it a lot. The sweet mangos help cut the spice in the jalapeño.
  • 1 small jalapeño chile, seeded and finely chopped - Make sure and use latex gloves when you seed and chop a jalapeno pepper. You do not want seed juice in your eyes. Believe me. If you don’t like spice, start with ½ jalapeno – you can always add more if you want more kick.
  • ½ cup chopped cilantro
  • 2 Tablespoons lime juice (use fresh)
  • 1 Tablespoon agave nectar
  • I used honey.
  • 2 tsp. toasted sesame oil - This has a very strong flavor, don’t overdo it
  • 1 tsp. low-sodium tamari
  • ½ cup toasted almonds, chopped
Instructions
  1. Combine bok choy, carrot, cabbage mango, jalapeño and cilantro in a large bowl.
  2. Add lime juice, agave, sesame oil and tamari. Toss to combine.
  3. Garnish with smoked or toasted almonds
3.5.3208

Add chicken if you want a more substantial meal.

Source: This recipe was adapted from the January/February 2013 issue of Vegetarian Times.

Do you like to make salads when it’s cold outside? What’s your favorite to make? 

Comments

Filed Under: Recipes

Homemade Pesto Served with Pasta (healthier version)

Shared June 11, 2016

garden-fresh-basil-pesto

I’ve never been able to successfully keep a basil plant alive, ever. Believe me, I’ve tried. But this year, I build raised beds and I jumped into the whole gardening thing – and I’m both shocked and humbled to have just harvested my very first homegrown batch of basil. I won’t go all mushy on you – but I’m feeling very basil-blessed after harvesting it all and making up a batch of the most delicious, fresh pesto I’ve ever had. Maybe it tastes so good, because it came from my garden. Yes, that’s probably it, but that’s okay. I think savoring the bounty is the real reason anyone gardens anyway. So I’ll sit back, smile and savor it. And I’ll share with you my simple, healthier, pesto recipe.

If you don’t have homegrown basil, don’t despair. Buy it from Trader Joe’s (great price) or in the produce section of most grocery stores.

This recipe is a little healthier than other recipes because it calls for less olive oil. I substitute olive oil with water from boiled pasta (pasta water). It also has less cheese and fewer pine nuts than other recipes. I still think it tastes superb, but you can always add more of whatever you like. Want more olive oil? Add less water. It’s very difficult to screw it up.

Homemade Pesto Served with Pasta (healthier version)
 
Save Print
Author: Heather
Ingredients
  • Fresh Basil 2 cups(I doubled this recipe, I figure if you’re going to make it, go for a big batch and then freeze remaining pesto). Wash and dry basil.
  • Pine nuts 2-3 tablespoons, these are expensive, so you can start with less then add more if you want more flavor. I like the pine nut flavor so I’m more of a 3 tablespoons kinda gal. Buy it in bulk to save. Or check Amazon or Costco.
  • Fresh parmesan cheese, shredded ¼ cup – ½ cup
  • Costco has a great price on this.
  • Garlic 2-3 cloves, peeled
  • Olive oil 1 tablespoon
  • Water, from boiled pasta ¼ cup
  • Salt, ½ teaspoon
Instructions
  1. Throw washed basil into large food processor. I made a double batch and it fit perfectly in my Cuisinart 14-cup food processor (which I adore).
  2. Toss in pine nuts, peeled garlic and shredded cheese.
  3. Add olive oil. The more you add, the richer it will be. We did one tablespoon (2x for double batch).
  4. Pulse the food processor and get it going. See what the consistency looks like. Slowly add pasta water until you get it to the consistency that you like. Avoid making it runny, if you are adding it to freshly boiled pasta there is going to moisture from that as well.
  5. Taste it. Need more garlic? More olive oil? Pine nuts? Add them and blend again. It’s really easy – you can’t screw it up, I promise. Make it to your liking.
  6. And you’re done! It’s that easy. Scrap out pesto into bowl. Serve on pasta, chicken, sandwiches, with a cheese plate or on a burger.
3.5.3208

I like to freeze my extra pesto. This last time I used a mini muffin pan – each spot holds about 1 tablespoon of basil. A great serving size – a little bit goes a long way, especially on pasta. Once it’s frozen pop the pieces into a plastic bag and you can take out one at a time. I used a metal mini muffin pan, but here is a silicone mini muffin pan – I bet it would work great for popping out the frozen pesto packs – HIC Brands that Cook Essentials Silicone 24-Cup Mini Muffin Pan.

If you don’t have a mini muffin pan, you can use an ice cube tray.

What’s your favorite way to make pesto? What types of foods do you like to serve with pesto?

Comments

Filed Under: Recipes

Iced Coffee Smoothie with Banana and Oatmeal

Shared June 11, 2016

iced-coffee-smoothie-with-bananas-oatmeal

It’s the 3 o’clock hour for me. . . .when I hit a wall. When I think I’m hungry but dinner isn’t far along. When I need a pick-me-up to get me through to dinner time. Well here’s a smoothie recipe that will do just that.

Have you seen International Delight’s new light Iced Coffee? It’s available in both Vanilla and Mocha, is only 100 calories per serving, and is great poured right into a glass of ice. Or if you’re looking for something a little more filling, make this protein-packed Iced Coffee Smoothie with banana and oatmeal. I think it’s like having an oatmeal, banana cookie . . .in a glass with a little caffeine for good measure.

Iced Coffee Smoothie with Banana and Oatmeal
 
Save Print
Author: Heather
Recipe type: Snack
Ingredients
This shake could be made with whatever you have on hand – but this is what I did.
  • ⅓ cup quick cook oatmeal
  • ⅓ cup vanilla yogurt
  • 2 bananas, ripe (and preferably frozen, but if not, no biggie)
  • 1 cup International Delight Light Iced Coffee – Vanilla or Mocha, you pick
  • 2 cups of ice
Instructions
  1. Put quick cook oatmeal into blender first. Pulse until it’s a fine dust. I don’t mind the texture of little oatmeal grits, but if this idea grosses you out you can either cook the oats with some hot water ahead of time or leave them out.
  2. Once oatmeal is nice and powdery, add all other ingredients. Blend until smooth.
  3. Pour into glass and enjoy! Makes enough for two large glasses. Put one in a jar with a lid for breakfast in the morning!
3.5.3208

If you’re into protein powders – I bet you could substitute protein powder for the oatmeal, as well.

With less calories and less sugar, International Delight Light Iced Coffee lets you enjoy MORE of what you love! For more fun ways to break up your day, visit ID’s new online games today for a chance to win sweet prizes and coupons to use on your next purchase!

This is a sponsored post.

What snack do you like in the afternoon – that time when you’ve already had lunch, but dinner is hours away?

Comments

Filed Under: Recipes

Blueberry Banana Bread

Shared June 11, 2016

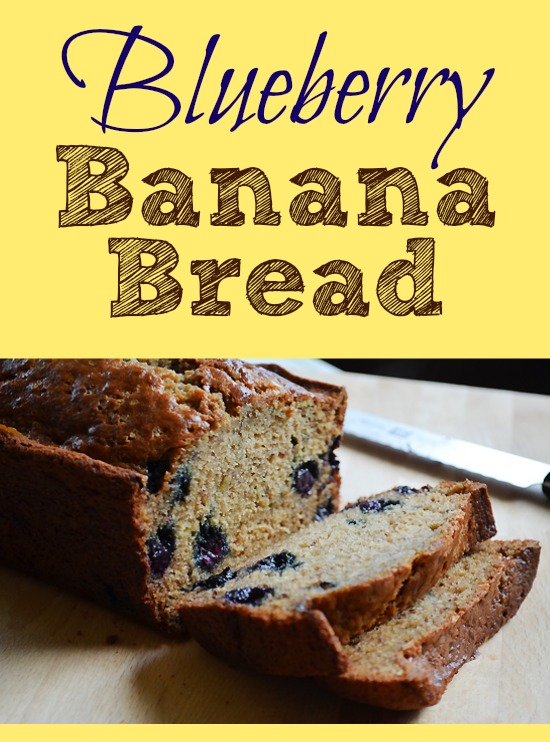
Blueberry-Banana-Bread-Recipe-no-oil

We had some freckled bananas that were screaming to be eaten. We rarely have too-ripe bananas – as they usually get devoured by my little monkeys before this point. But this week we had a few ripe bananas, so I whipped up a batch of banana bread – adding blueberries. This time, instead of vegetable oil, I added Tillamook Greek Homestyle Vanilla Yogurt and Coconut Oil! I think it was awwwee-mazing and I’m not sure I’ll make banana bread with vegetable oil again!!

Blueberry Banana Bread
 
Save Print
Author: Heather
Recipe type: Breakfast
Ingredients
  • 1½ cups all-purpose flour
  • 1 teaspoon salt
  • 1 teaspoon baking soda
  • ½ teaspoon baking powder
  • ½ teaspoon ground cinnamon
  • ⅛ teaspoon ground nutmeg
  • ½ Cup regular sugar
  • ½ Cup brown sugar
  • ¼ Cup coconut oil - I didn’t melt this before mixing and sort of wish I had. If you bake with coconut oil – do you warm it up first? I don’t have much experience with this.
  • ¼ Cup Vanilla Greek Yogurt - I used Tillamook Farmstyle Vanilla Greek yogurt – amazing!
  • 2 large eggs, beaten
  • 1 Tablespoon vanilla extra
  • 2 ripe bananas, peeled, mashed, bananas
  • 1 Cup frozen blueberries - I’m sure you could use fresh blueberries, if you had them!
Instructions
  1. Preheat oven to 350 degrees F
  2. Butter a 9- by 5- by 3-inch loaf pan. Some recommend also dusting with flour, I didn’t do this.
  3. In a medium bowl, whisk together your flour, salt, baking soda, baking powder, cinnamon and nutmeg.
  4. In another bowl, mix together your sugars, coconut oil, yogurt, eggs and vanilla until blended. Stir in the bananas. Once your batter is mixed, gently fold in blueberries (I added mine frozen – do not thaw).
  5. Mix all ingredients together in one bowl. Pour batter into loaf pan.
  6. Bake at 350 degrees F for about an hour (60 minutes) – or until a toothpick or cake tester comes out clean. Let it cool for at least 20 minutes before removing from pan.
3.5.3208

Ideally you’d let this cool for another couple hours. But seriously – who can wait that long?

My kids devoured this. My six-year-old son exclaimed, “This is fantastic mom! It’s the best you’ve ever made. And the crust. . . it’s perfect!” Well if that isn’t a compliment, I don’t know what is!

I hope you (and yours) enjoy this recipe as much as we did!!

I adapted this recipe from Food Network Blueberry-Banana Bread from Giada De Laurentiis

What’s your favorite variation of banana bread? 

Comments

Filed Under: Recipes

Banana, Oatmeal and Brown Sugar Waffles (no syrup required!)

Shared June 11, 2016

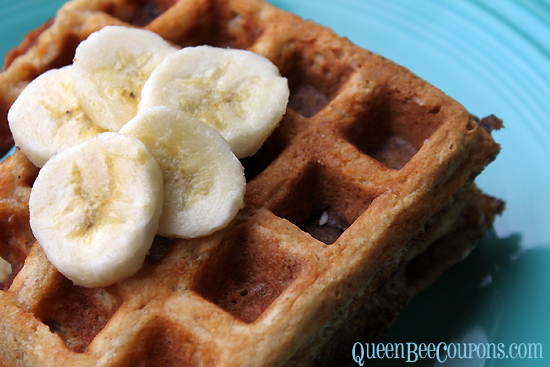
Banana-Waffles-Brown-Sugar-Oatmeal

Since we happened upon 63 pounds of bananas, we’ve been enjoying all things bananas this week –  Roasted Coconut Banana Bread, banana chocolate chip cookies, banana smoothies and dried banana chips! Today we kicked off the weekend with banana, oatmeal, brown sugar waffles – and seriously, they were so good we didn’t need to use an ounce of syrup.

This recipe comes from Waffles: Fun Recipes for Every Meal.

Banana, Oatmeal and Brown Sugar Waffles (no syrup required!)
 
Save Print
Author: Heather
Recipe type: Breakfast
Ingredients
  • Eggs, 2 large
  • Whole milk, 1½ cup – We ended up combining mostly 1% milk with a little half and half.
  • Unsalted butter (melted) ½ cup or canola oil ½ cup
  • Vanilla extract, 1 teaspoon
  • All-purpose flour, 1 cup
  • Whole-wheat flour, ½ cup – We just used all-purpose.
  • Rolled oats, ¾ cup
  • Golden brown sugar, 3 tablespoons (plus 2-3 teaspoons for sprinkling)
  • Baking powder, 1 tablespoon
  • Cinnamon, ½ teaspoon
  • Salt, ¼ teaspoon
  • Ripe bananas, 2 large, chopped into ¼ inch slices
  • Optional: syrup (we didn’t need)
Instructions
  1. Preheat waffle maker
  2. In a medium bowl whisk together eggs, milk, butter and vanilla
  3. In a large bowl, mix together the flours, oats, 3 tablespoons brown sugar, baking powder, cinnamon and salt.
  4. Make a well in the middle of the dry ingredients, add eggs
  5. Whisk until smooth, with a few lumps. Fold in three-fourths of the bananas (we’ll use the rest later)
  6. Spoon about ½ cup to ¾ cup waffle batter into the waffle maker for each batch. Before closing waffle maker sprinkle 1 teaspoon brown sugar and top with 1-2 slices of banana.
  7. Cook until waffles are crisp and brown, 3-4 minutes. Spray waffle maker with non-stick spray before putting on next batch.
  8. Remove waffles and serve right away. Or keep them on a baking sheet at 200 degrees F for up to 20 minutes before serving.
  9. You can serve with syrup, but honestly I think the brown sugar and caramelized bananas make it plenty sweet.
3.5.3208

Last month we made homemade waffles with enough butter to make Paula Deen proud, check those out!

Do you have a favorite waffle recipe? 

Comments

Filed Under: Recipes

Banana Chips in the Food Dehydrator

Shared June 11, 2016

Dried-Banana-Chip-recipe

We’ve been enjoying our bananas this week – with a Roasted Coconut Banana Bread, banana smoothies, banana chocolate chip cookies and dried banana chips! The first batch my son helped me make – it was a super kid-friendly project. It took about 13 hours in the dehydrator  – as we wanted them extra crisp and let me tell you, they didn’t even last that long!

I borrowed a food dehydrator from another preschool mom and I’m not sure I want to give it back.

Basically we just sliced bananas thin (and as uniform as possible) and dropped them into a mixing bowl with lemon juice. This helps keep them from turning dark brown. We started the dehydrator around 8 p.m. at night and let it do it’s thing until around 11 a.m. the next day. Every other recipe I read said 8-10 hours, but I wanted extra crisp banana chips, so we left them on longer.

We stored them in an air tight container – although that didn’t matter much since they were devoured in day.

A couple things I learned from this process:

  • The super duper crunchy ones you find at the grocery stores, the ones in trail mix and fancy packaging. Um yea, they are probably not dried, but rather fried. Sad, but true.
  • On the second batch I tried a tray without lemon juice – and they looked exactly the same. Doh! AND they seemed to stick to the tray less.
  • They did stick to the dehydrator tray. I popped them off with a knife. Only lost one finger in the process.
  • For the person who eats the most in the house (ahem, my handsome husband) – have him pull the banana chips off the trays on the second batch. He’ll see how much work they are and think twice before eating the entire container in one day. Haha.
  • Your entire house will smell like bananas.

If you’re in the market for a dehydrator I recommend watching Craigslist, garage sales and thrift stores – they seem to be fairly common. If you prefer to go the new route, Amazon has some great dehydrator deals.

What is your favorite thing to dehydrate? 

Comments

Filed Under: Recipes

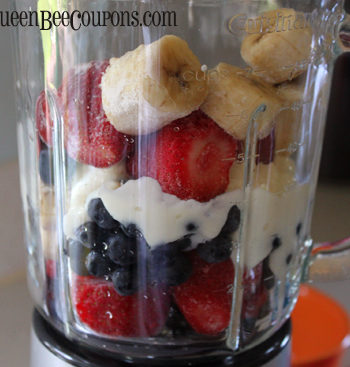
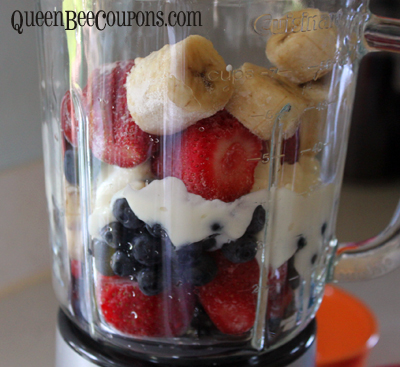
Banana, Strawberry, and Blueberry Smoothie

Shared June 11, 2016

Smoothie-in-blender-bananas

Yesterday I posted about roasted coconut banana bread (yum) and I’ll lighten things up a little today with a banana smoothie. My kids have been gulping these down ever since we picked up the 63 pounds of bananas for 11 cents this last weekend – it makes me happy knowing they are getting a healthy snack.

Smoothies are really very simple, seems silly to post as an official recipe – so we’ll keep it casual. . .

  1. Dig your blender out of the depths of your pantry.
  2. Add bananas and any other fruits you have hanging around. We added frozen strawberries and blueberries. I think using frozen berries in the summer time makes it thicker and more refreshing! To freeze the bananas, I just sliced in half and placed in plastic bags. I also sliced them onto a cookie sheet and froze them this way – which is easier for the blender to digest.
  3. Add a 1/2 cup to 3/4 cup of yogurt, we added vanilla yogurt
  4. Add 1/2 cup to 3/4 cup milk
  5. Blend until perfection

You can play around with the proportions to get it the right consistency. Since I was using frozen bananas and frozen strawberries I had to add a little extra milk so my blender could handle all the hard items. It’s a little different every time you make it – but always good. ?

What are your favorite combinations for smoothies? 

Comments

Filed Under: Recipes

Roasted Coconut Banana Bread

Shared June 11, 2016

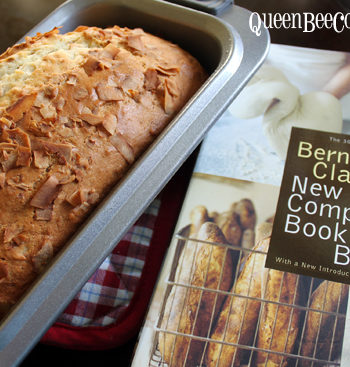
Banana-Coconut-Bread

Let the banana recipes begin. This weekend I was able to score 63 pounds of bananas for only $7 (only 11 cents a pound) – so we’ve been making the most of them! Yesterday I made a roasted coconut banana bread that my family loved! The recipe comes straight from Bernard Clayton’s New Complete Book of Breads.

Roasted Coconut Banana Bread
 
Save Print
Author: Heather
Recipe type: Breakfast
Ingredients
  • 1 cup flaked coconut
  • ¼ cup (1/2 stick) butter or margarine, room temperature
  • ¾ cup sugar
  • 2 eggs, room temperature
  • 3 tablespoons milk
  • 1 teaspoon lemon juice
  • ½ teaspoon almond extract – If you like almond flavor, I’d maybe add a full teaspoon?
  • 2 cups sifted all purpose flour
  • 1 teaspoon baking powder
  • ½ teaspoon baking soda
  • ½ teaspoon salt
  • 1 cup mashed ripe bananas (about two medium bananas)
Instructions
  1. Grease a 9 x 5 loaf pan. I just used butter.
  2. Spread coconut onto baking sheet and toast in oven at 350 degrees. The recipe said 15 minutes – but mine was very brown after five minutes, so keep a close eye on it.
  3. In a large mixing bowl (or mixer) – mix together butter and sugar. Beat in eggs, one at a time. Mix in milk, lemon juice, and almond extract.
  4. Sift flour again into mixing bowl with baking powder, baking soda and salt.
  5. Blend well. Add in bananas and gently fold in coconut (save some coconut to sprinkle on top of loaf)
  6. Pour mixture into greased loaf pan. Push dough to corners with a scraper.
  7. Sprinkle remaining coconut on top
  8. Bake until light brown at 350 degrees – for about an hour. You’ll know it’s done if you stick a toothpick in middle and it comes out clean (no batter on it).
  9. Let loaf cool about 10 minutes, then turn over onto wire rack.
3.5.3208

What’s your favorite kind of bread to bake?

Comments

Filed Under: Recipes

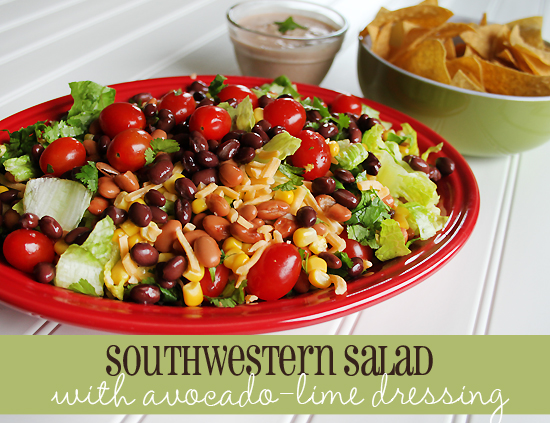
Southwestern Salad with Avocado-Lime Dressing

Shared June 11, 2016

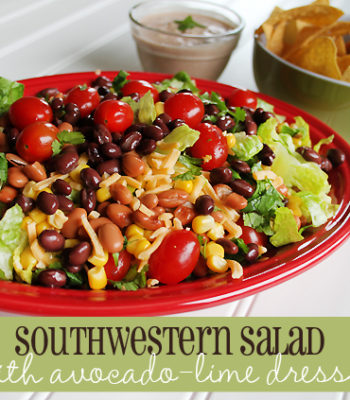
southwestern-salad-with-avocado-lime-dressing

This salad is super easy. Most of the ingredients can probably be found in your freezer or pantry. Add more of the ingredients you like and leave off the ones you don’t. You can’t really mess it up.

Southwestern Salad with Avocado-Lime Dressing
 
Save Print
Author: Heather
Recipe type: Salad
Ingredients
  • 2 Cups chopped romaine. I didn’t measure, that just seems silly. You basically just need a heap of lettuce.
  • 1 can of pinto beans, rinsed and drained (about 1.5 cups)
  • ½ Cup of black beans, rinsed and drained
  • 1 Cup of Grape tomatoes
  • ½ Cup fresh, frozen or canned corn kernels
  • ⅓ Cup green onions (I left this off)
  • ½ Cup shredded cheddar cheese
  • Optional – ⅓ Cup crushed tortilla chips
  • Optional – Sliced fresh avocado
DRESSING INGREDIENTS
  • 1 ripe avocado
  • ¾ Cup salsa
  • ½ cup low-fat sour cream
  • 3 Tablespoons lime juice (I recommend fresh)
  • 4 drops Tabasco sauce (optional)
Instructions
  1. Start with your romaine and top it with all salad ingredients. Add more of the things you like and less of what you don’t.
  2. In a separate bowl, mash ripe avocado with a fork until it’s mushy. Whisk together with all the other dressing ingredients.
  3. Pour dressing over salad and serve with chips if you’d like.
3.5.3208

Source: This recipe was adapted from a recipe I found in the May/June 2010 issue of Vegetarian Times. 

Comments

Filed Under: Recipes

  • « Previous Page
  • 1
  • …
  • 8
  • 9
  • 10
  • 11
  • 12
  • …
  • 17
  • Next Page »
Happy-Hive-About

Recent Posts

  • How to Clean Stained Cutting Board {Naturally}
  • Homemade play dough using Kool-Aid or Jell-O (preschool teacher and kid approved!)
  • Homemade Hummingbird Food (Nectar)
  • Peanut Butter and Jelly Gelato {Kid-friendly recipe}
  • Spring Cupcake Designs – 6 Easy Spring and Easter Cupcake Designs

Recent Comments

  • Jana Miller on Cottonwood, Jerome, Sedona, Prescott, more {Arizona}
  • Sue Eichler on Cottonwood, Jerome, Sedona, Prescott, more {Arizona}
  • Paris Jeske on Earning a living on the road – How we (and others) are making money while we travel full-time
  • Paris Jeske on Earning a living on the road – How we (and others) are making money while we travel full-time
  • Karen on Healthcare benefits on the road – We break an arm and end up in emergency room!

Recent Posts

  • How to Clean Stained Cutting Board {Naturally}
  • Homemade play dough using Kool-Aid or Jell-O (preschool teacher and kid approved!)
  • Homemade Hummingbird Food (Nectar)
  • Peanut Butter and Jelly Gelato {Kid-friendly recipe}
  • Spring Cupcake Designs – 6 Easy Spring and Easter Cupcake Designs
This error message is only visible to WordPress admins

Error: No feed found.

Please go to the Instagram Feed settings page to create a feed.

Copyright ©2026, A Happy Hive. All Rights Reserved. Custom design by Pixel Me Designs